Build Custom Policy
Policies are an excellent resource in Cloudhouse Guardian (Guardian) that allow you to define a desired configuration state at the node or node group level. Policies are made up by a series of sections and checks, with each section used to organize the policy and define the hierarchy of checks within it. Once you have organized your sections in a custom policy, you can begin to define what checks you want to be run. Optionally, you can include specific attributes to be checked too. The following topic describes how to build a custom policy from scratch, using custom sections, checks, and attributes. For more information on policies, see Policies.
To build a custom policy, complete the following steps:
-
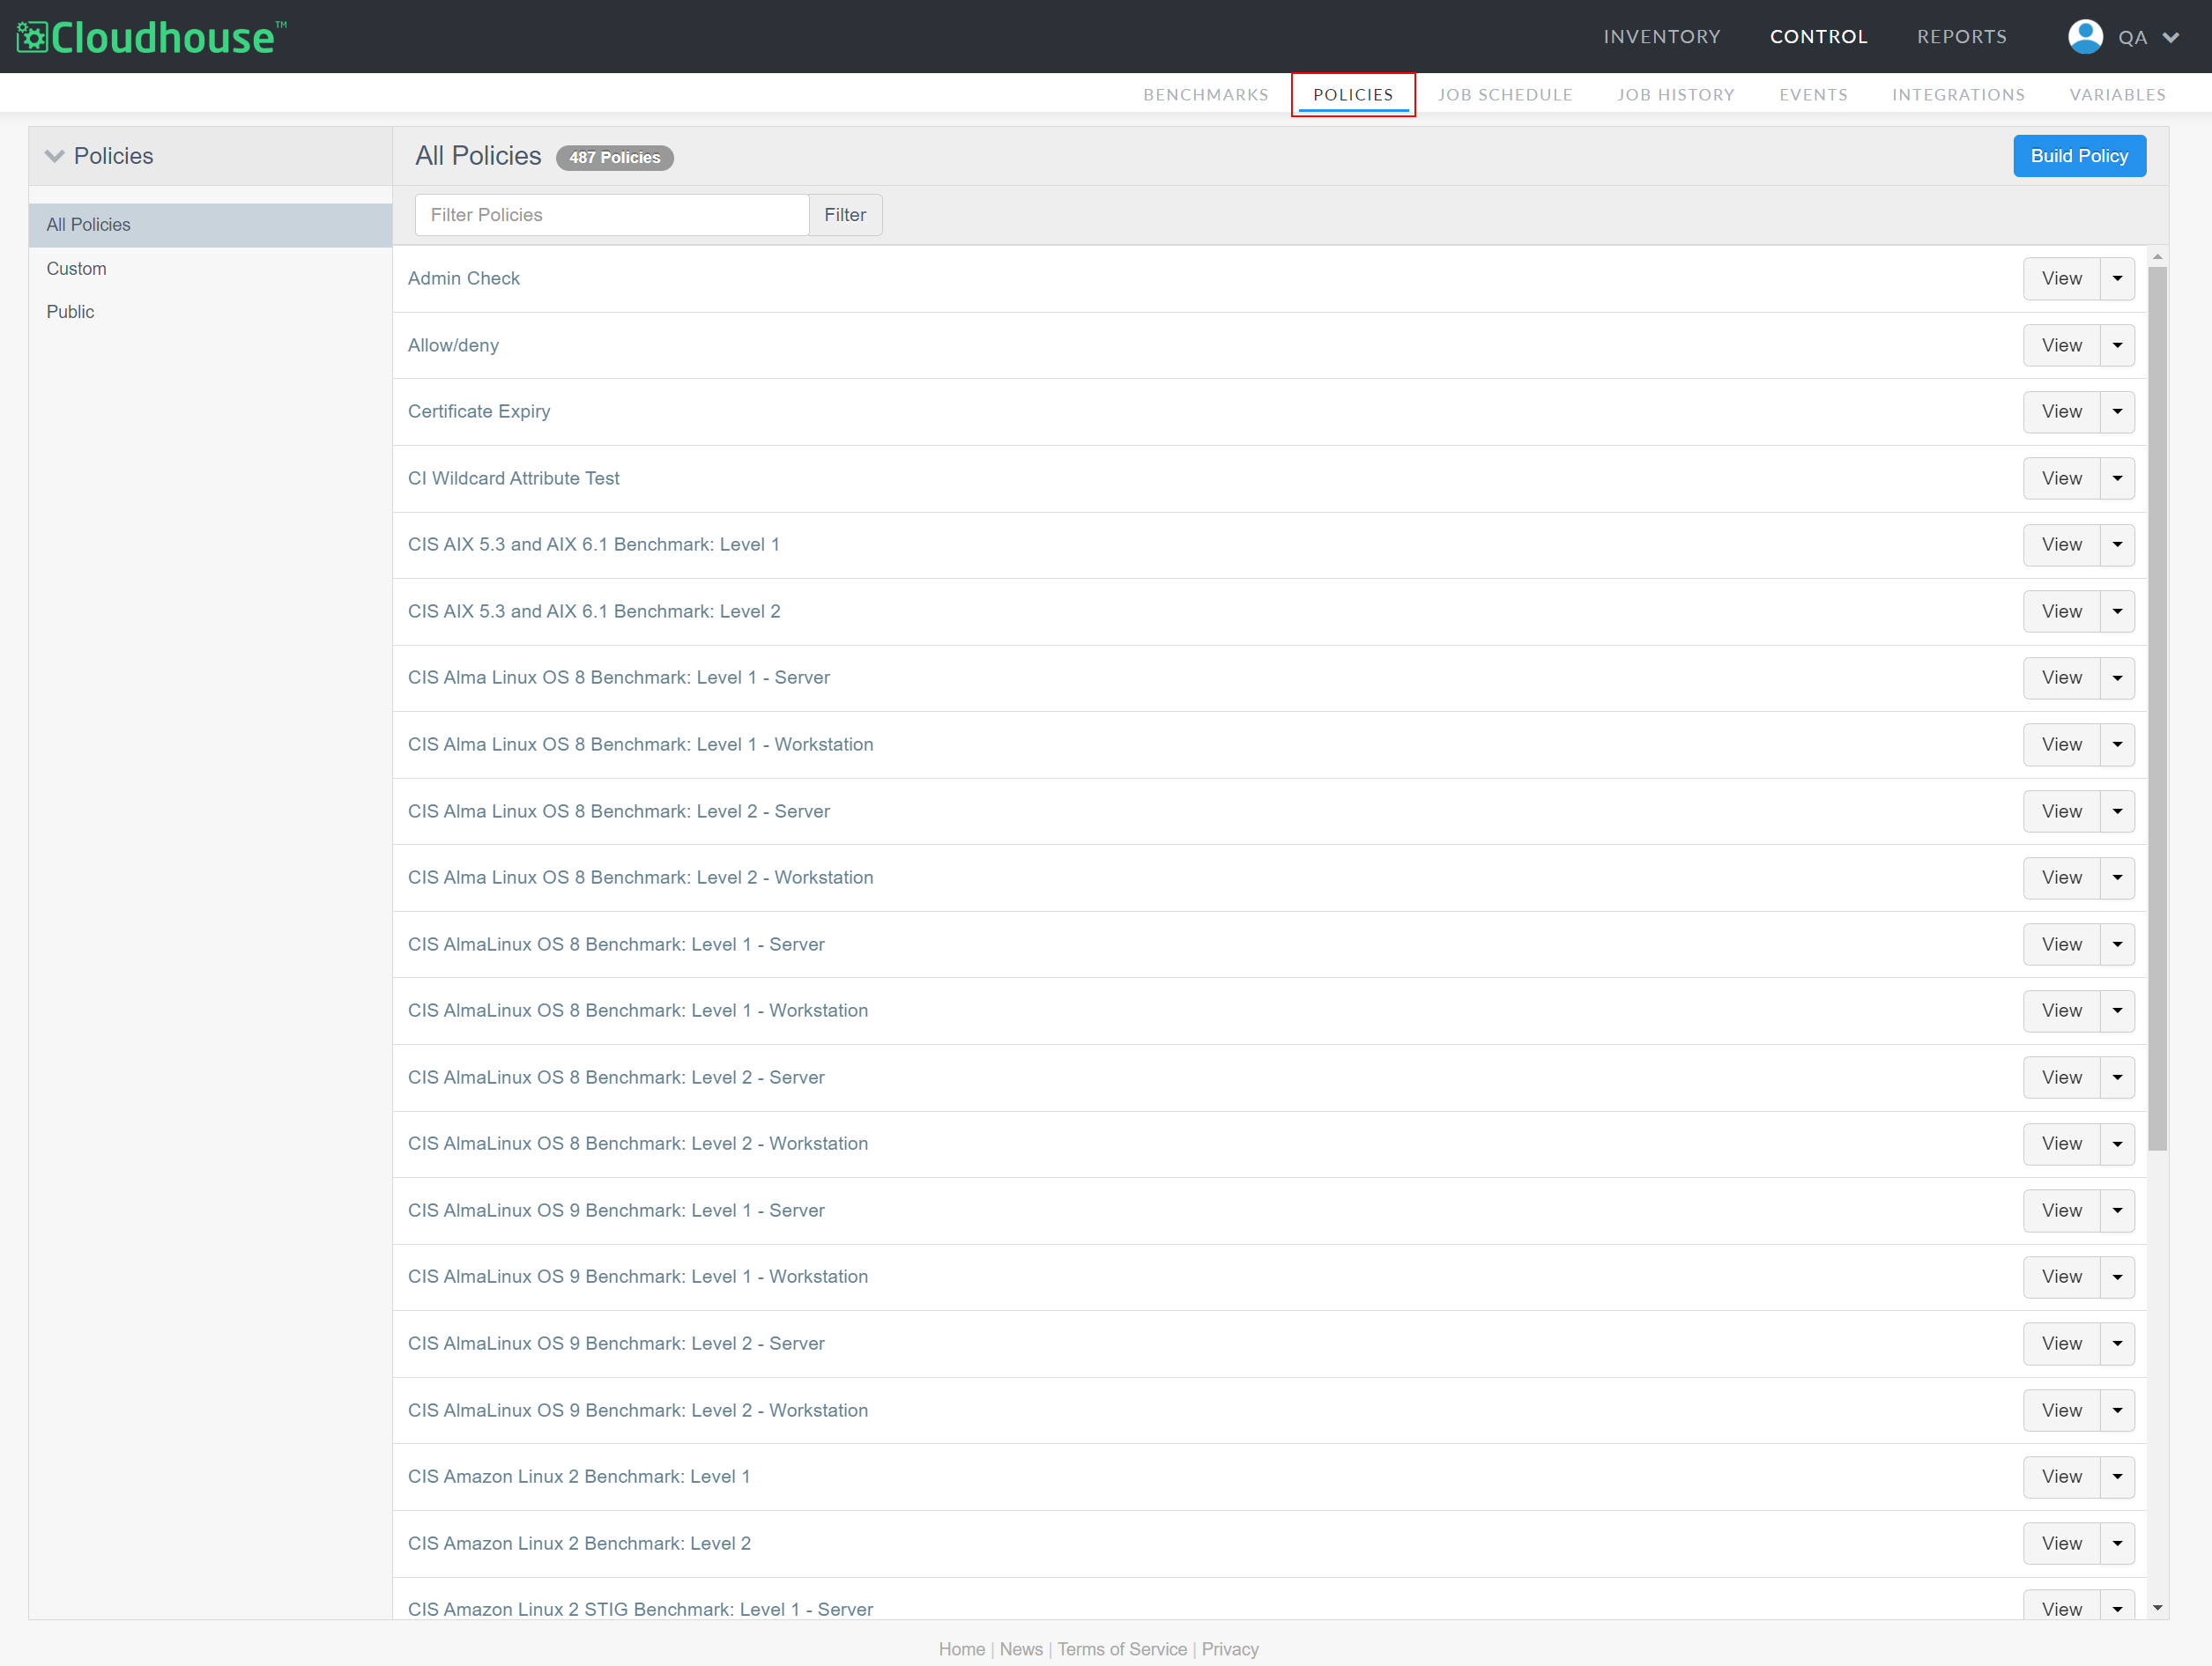
In the Guardian web application, navigate to the Policies tab (
-
Click the Build Policy button. The Build Custom Policy dialog is displayed.

-
Enter a Policy Name in the field provided.

-
Optionally, you can select a value from the Add to node group drop-down list. If selected, the policy is applied to the node group and run against each of the nodes that match the policy's criteria.
Note: If you leave this field blank, you are still required to assign the policy to a node group in order for it to be run. Otherwise, it will remain inactive.
-
Once complete, click to Start Building your custom policy. The policy builder page is displayed.
Here, you can begin building your custom policy by adding Sections, Checks, and then Attribute Checks. See below for more information on each aspect of the process.
Tip: Alternatively, at this point, you could choose to import an existing policy. For more information, see Import a Policy.
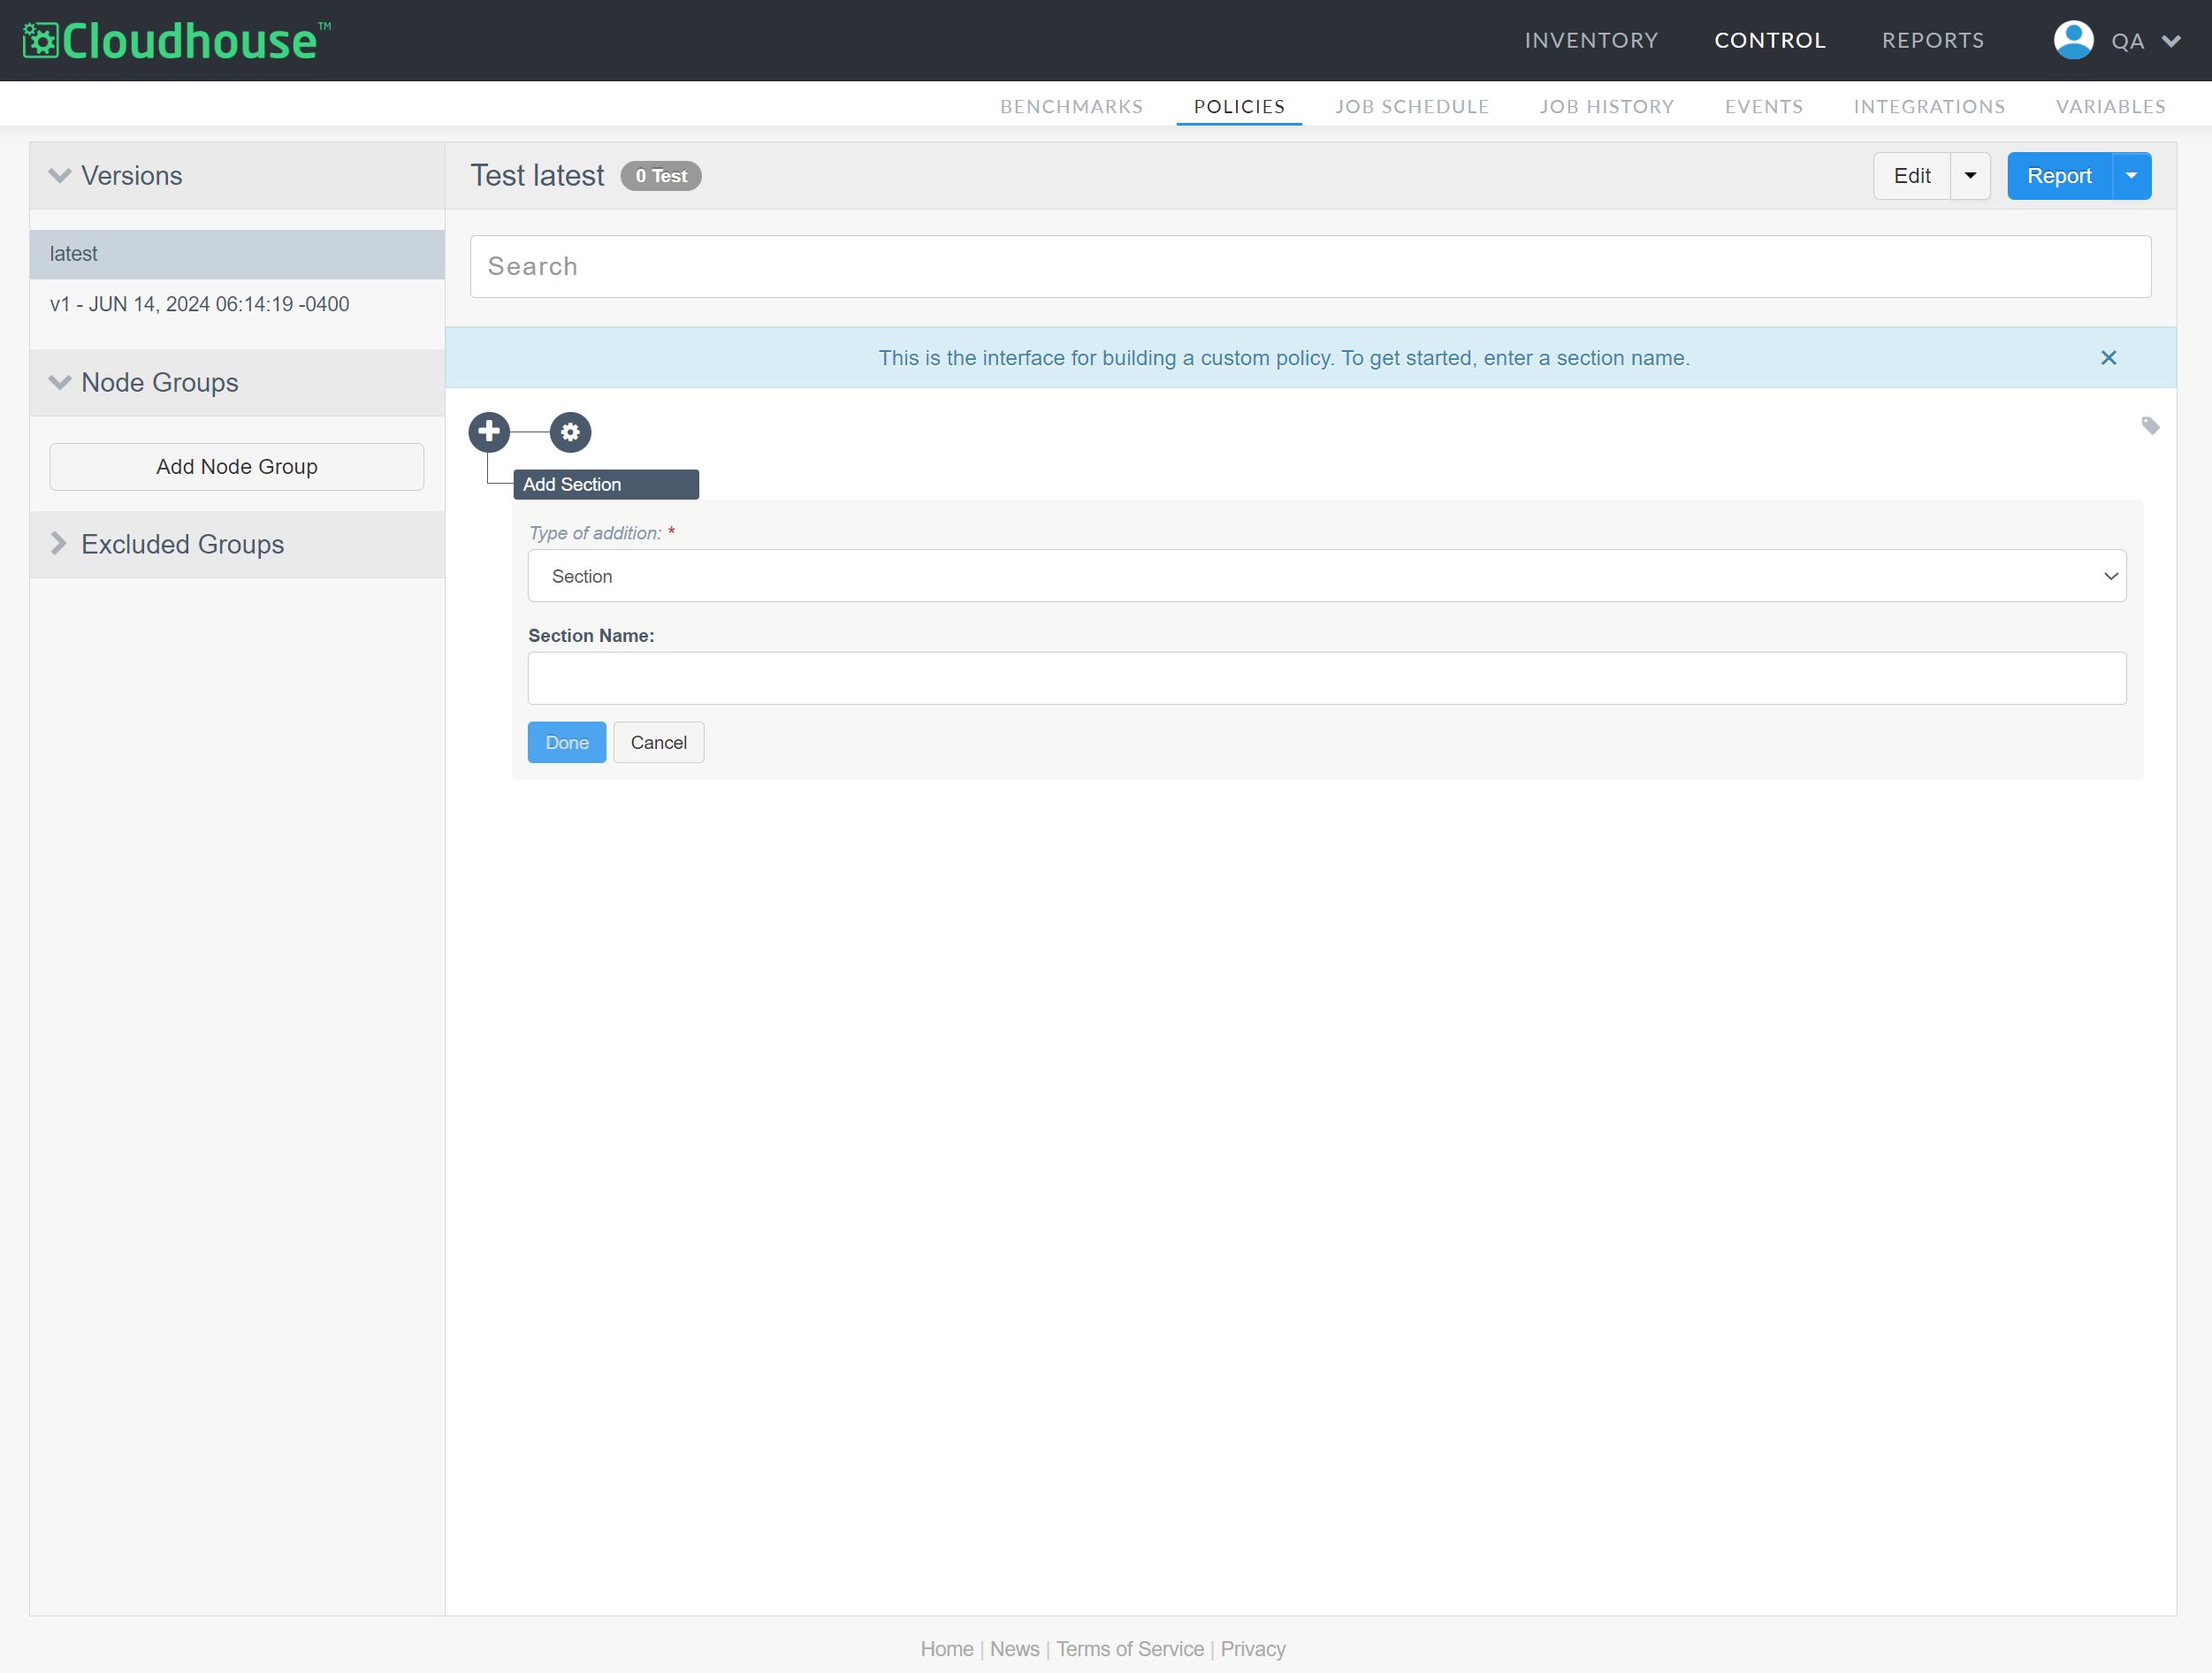
Sections
Policies are comprised of sections. Within each section, you can add the checks that you want to be run. The purpose of a section is to define the hierarchy for those checks. You can re-organize that hierarchy at any time by dragging and dropping a section at a time.

In the example above, no sections have been created. To add a new section, click the Add Section button ( ) and enter a Section Name in the field provided. Then, click Done. Repeat as required, then you can begin adding checks.
Note: If you are editing an existing policy, make sure that the Type of addition drop-down list is set to 'Section'.
Checks
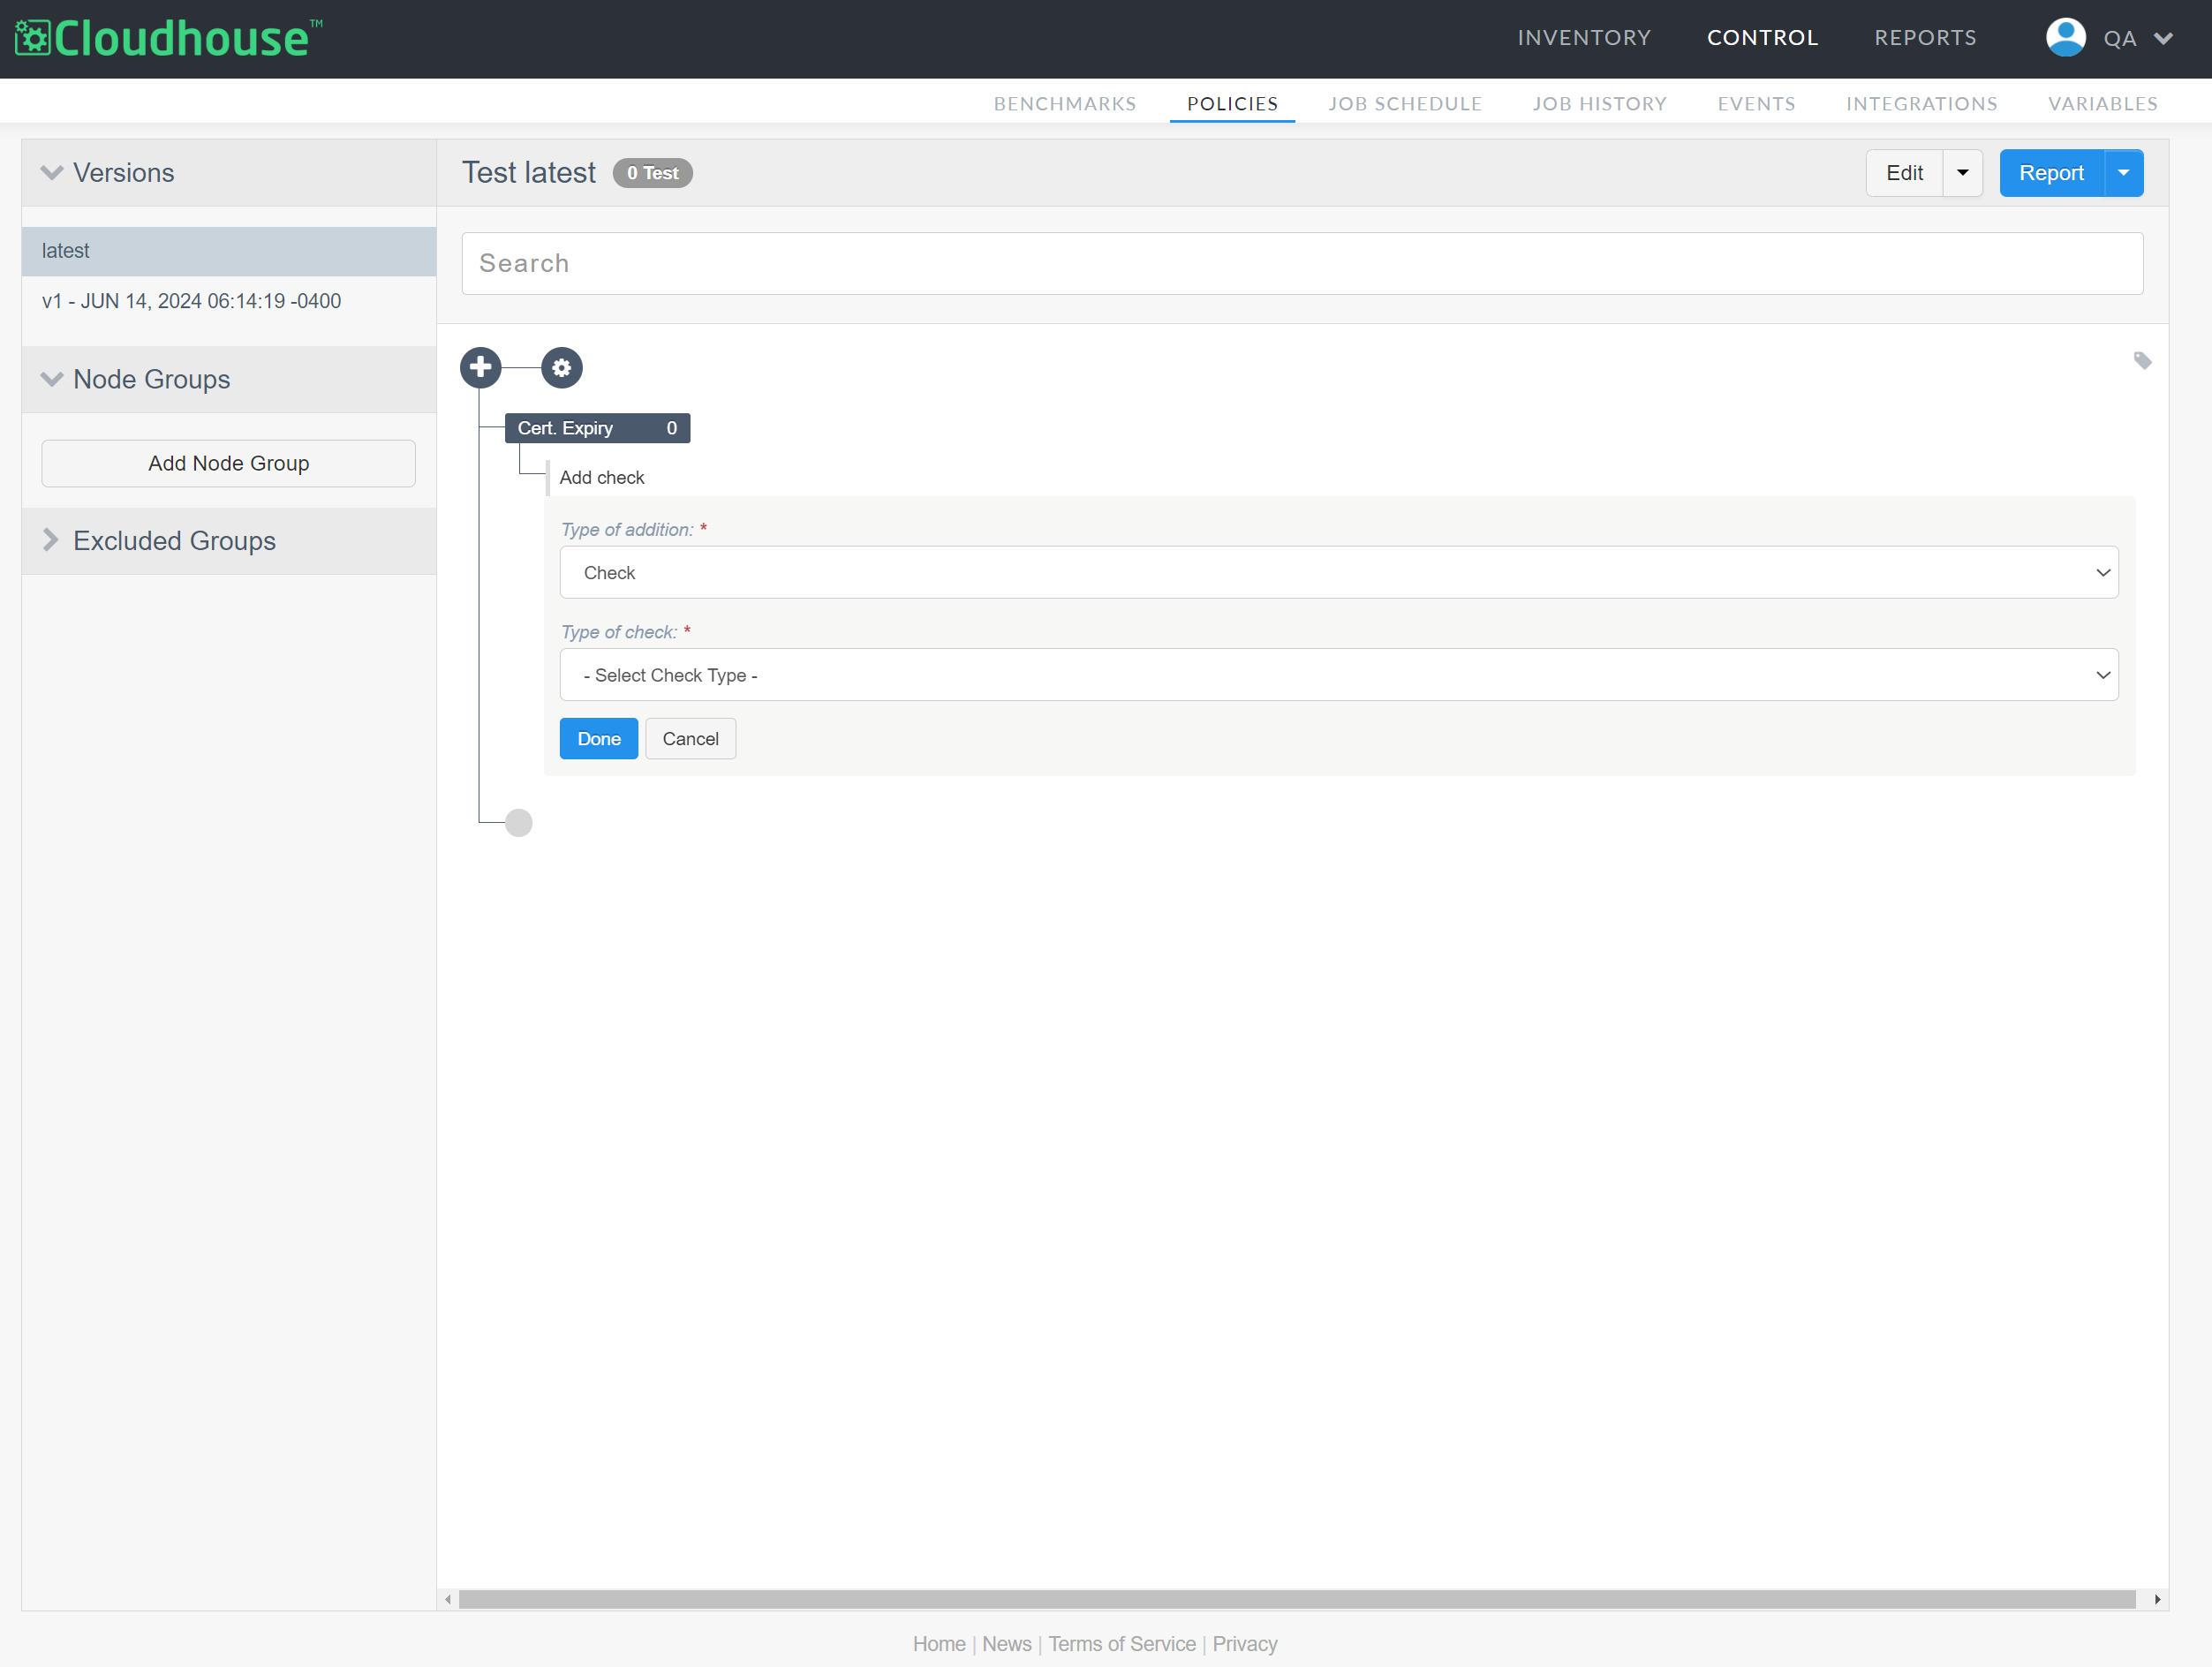
Checks are the crux of a policy. When a policy is run, it is the checks that are displayed within the node scan results as either 'Passed' or 'Failed'. In the example below, a check is being added to the 'Cert. Expiry' section. For more information on the node scan results page, see Node Scan Results.

To add a check to a section, complete the following steps:
-
Within an existing section, click the gray Add Check button (
 ) directly beneath it.
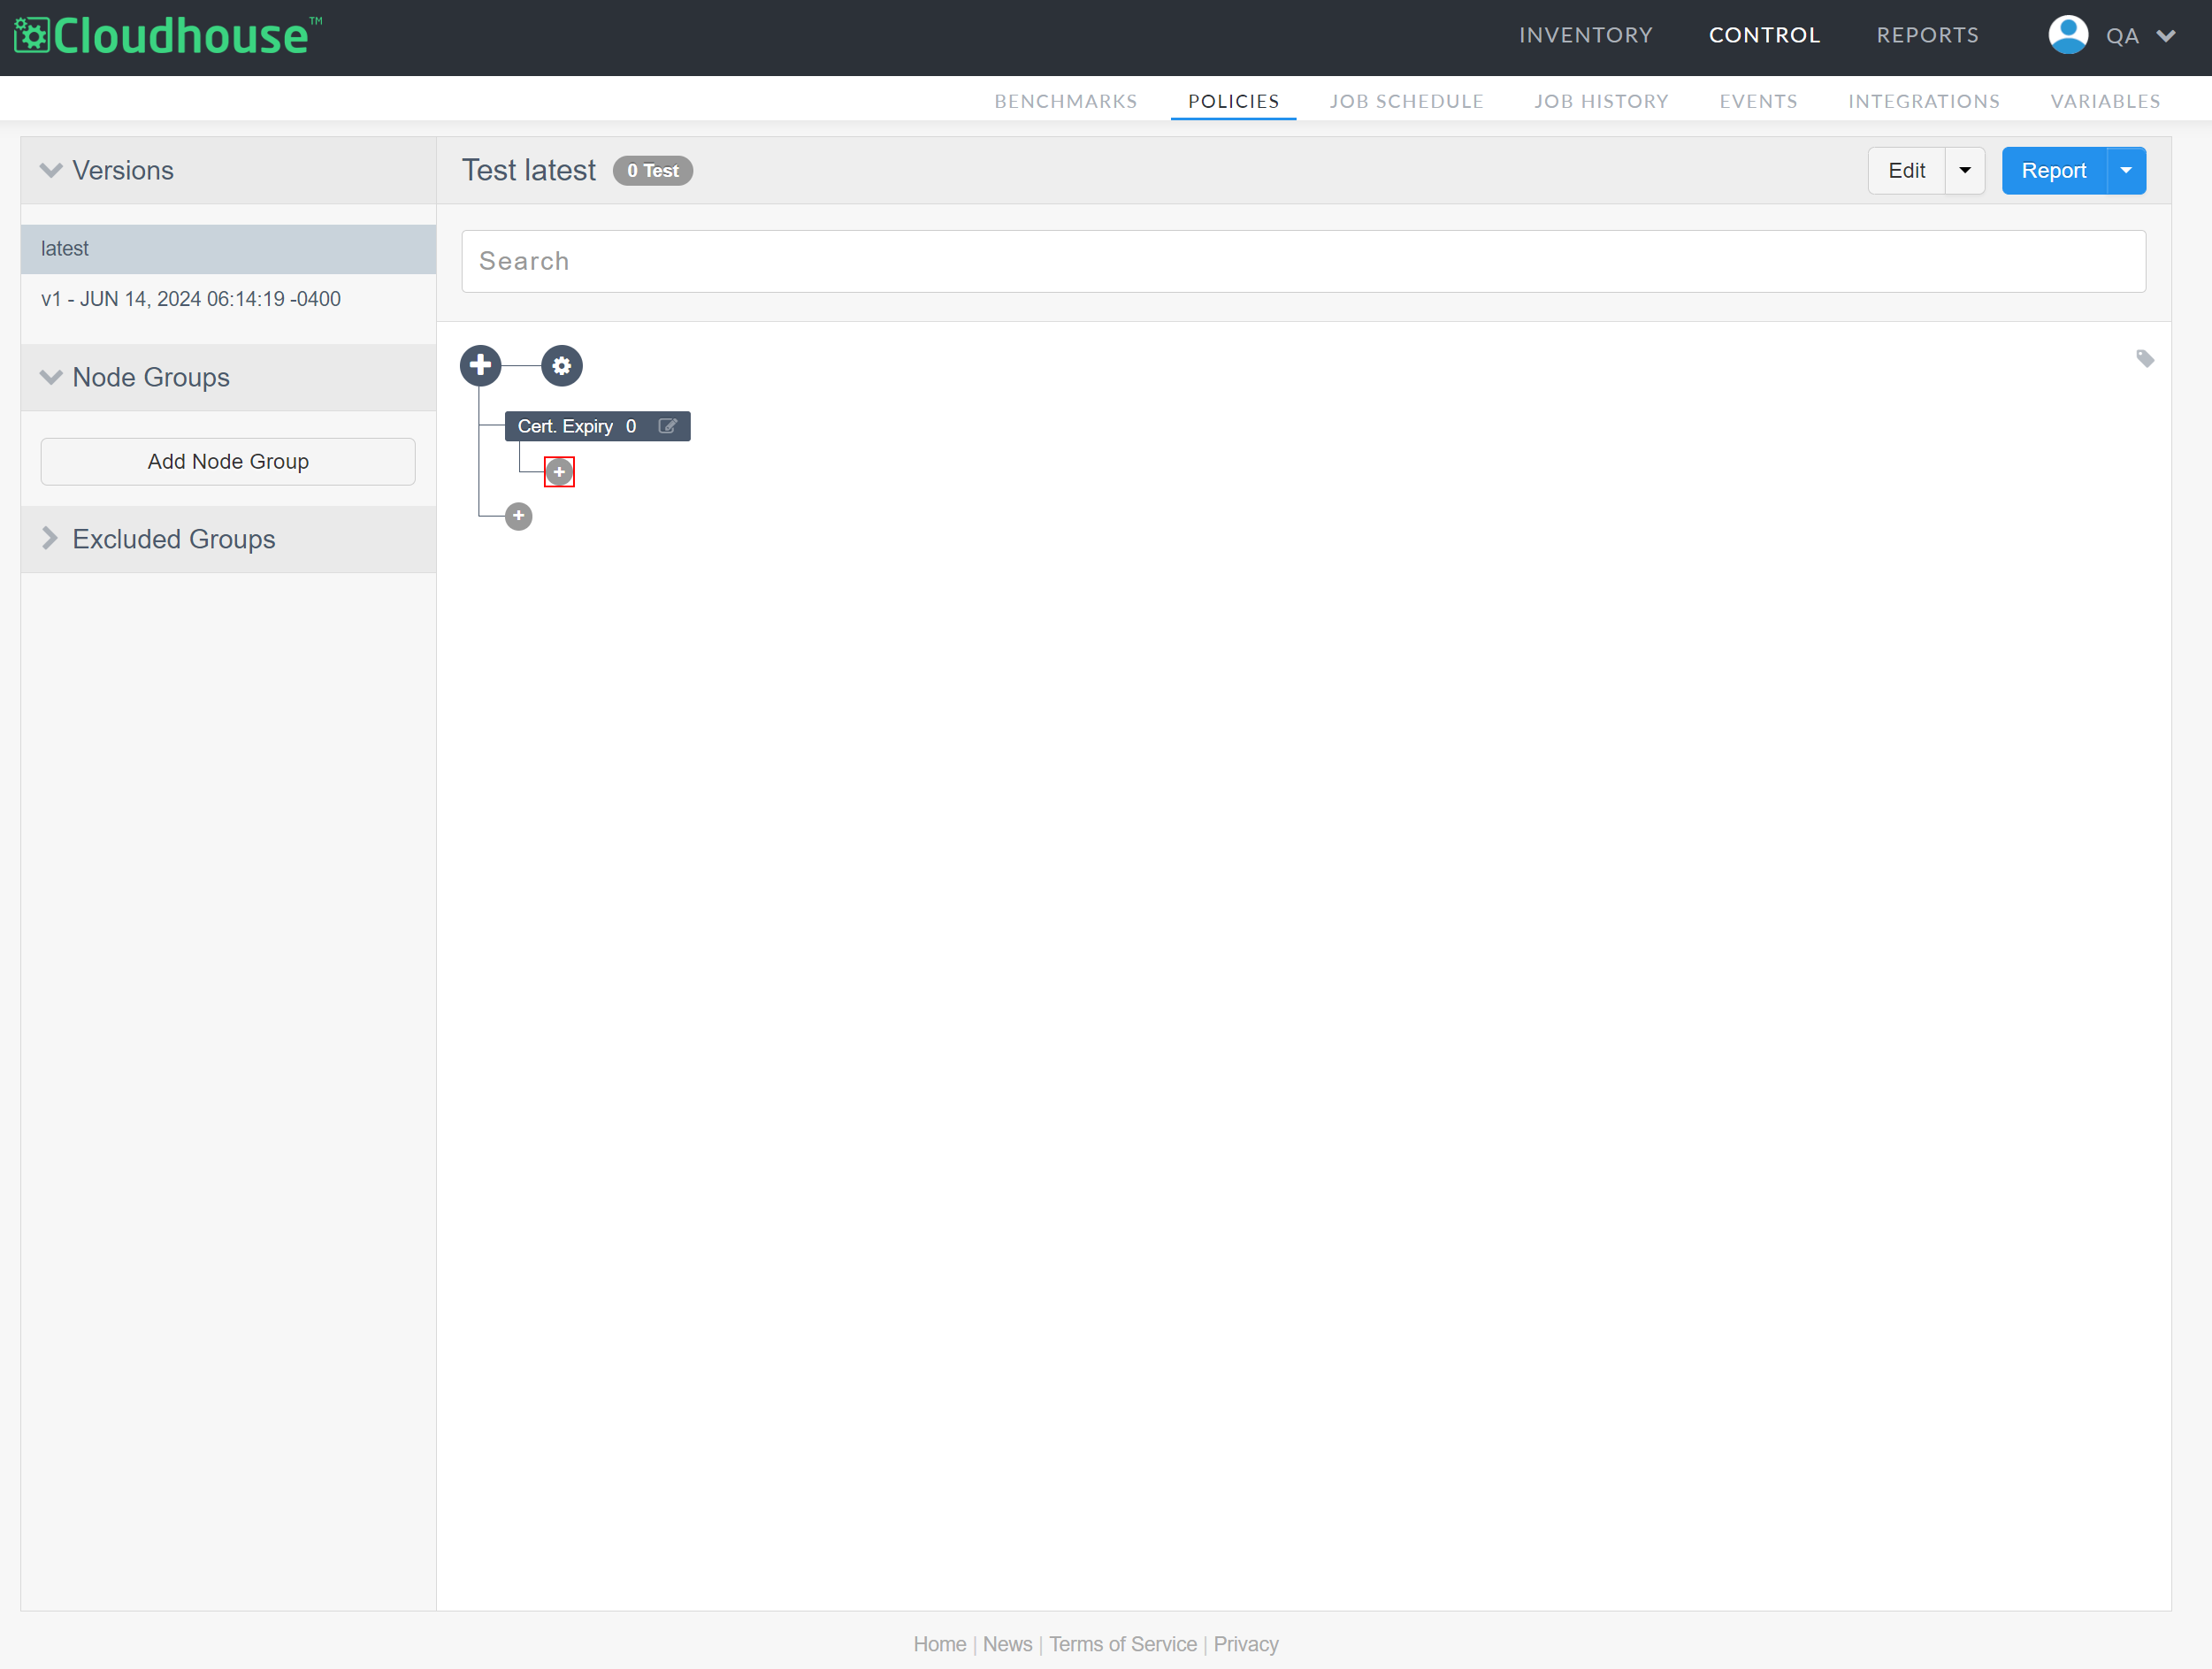
-
Select 'Check' from the Type of addition drop-down list.
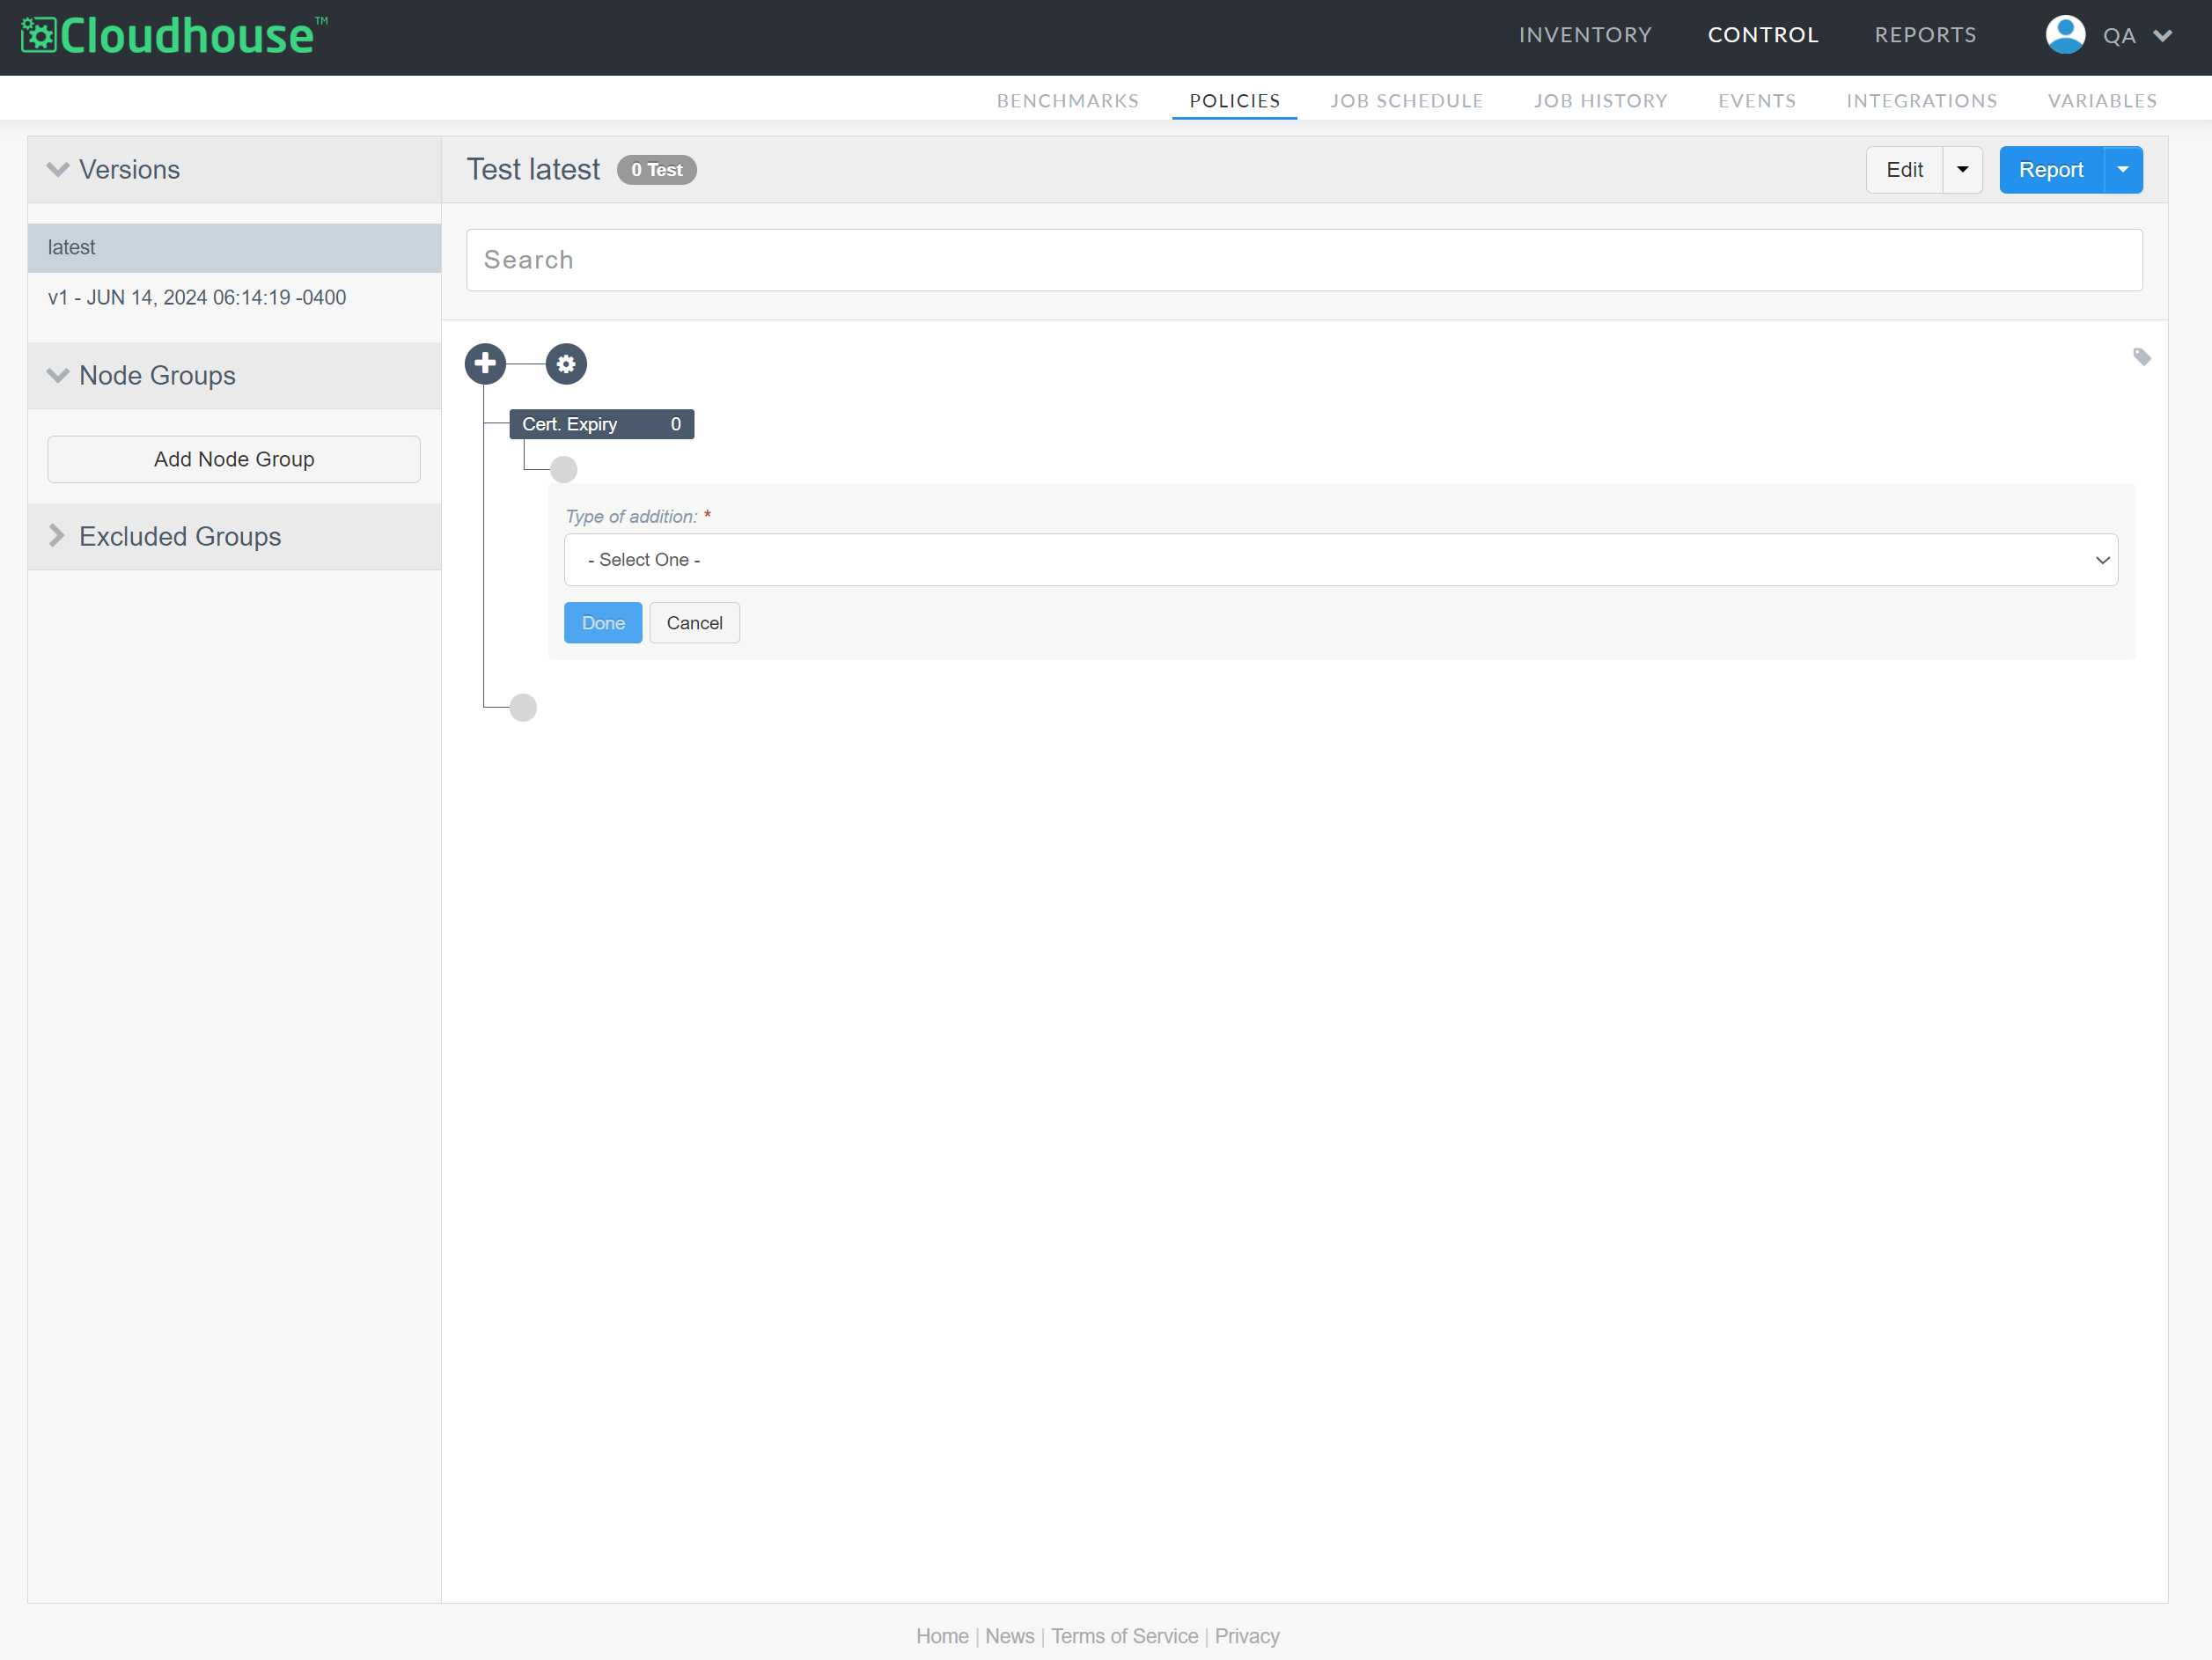
-
Select the Type of check you want to add from the drop-down list provided.
-
Enter a value in each of the required fields.
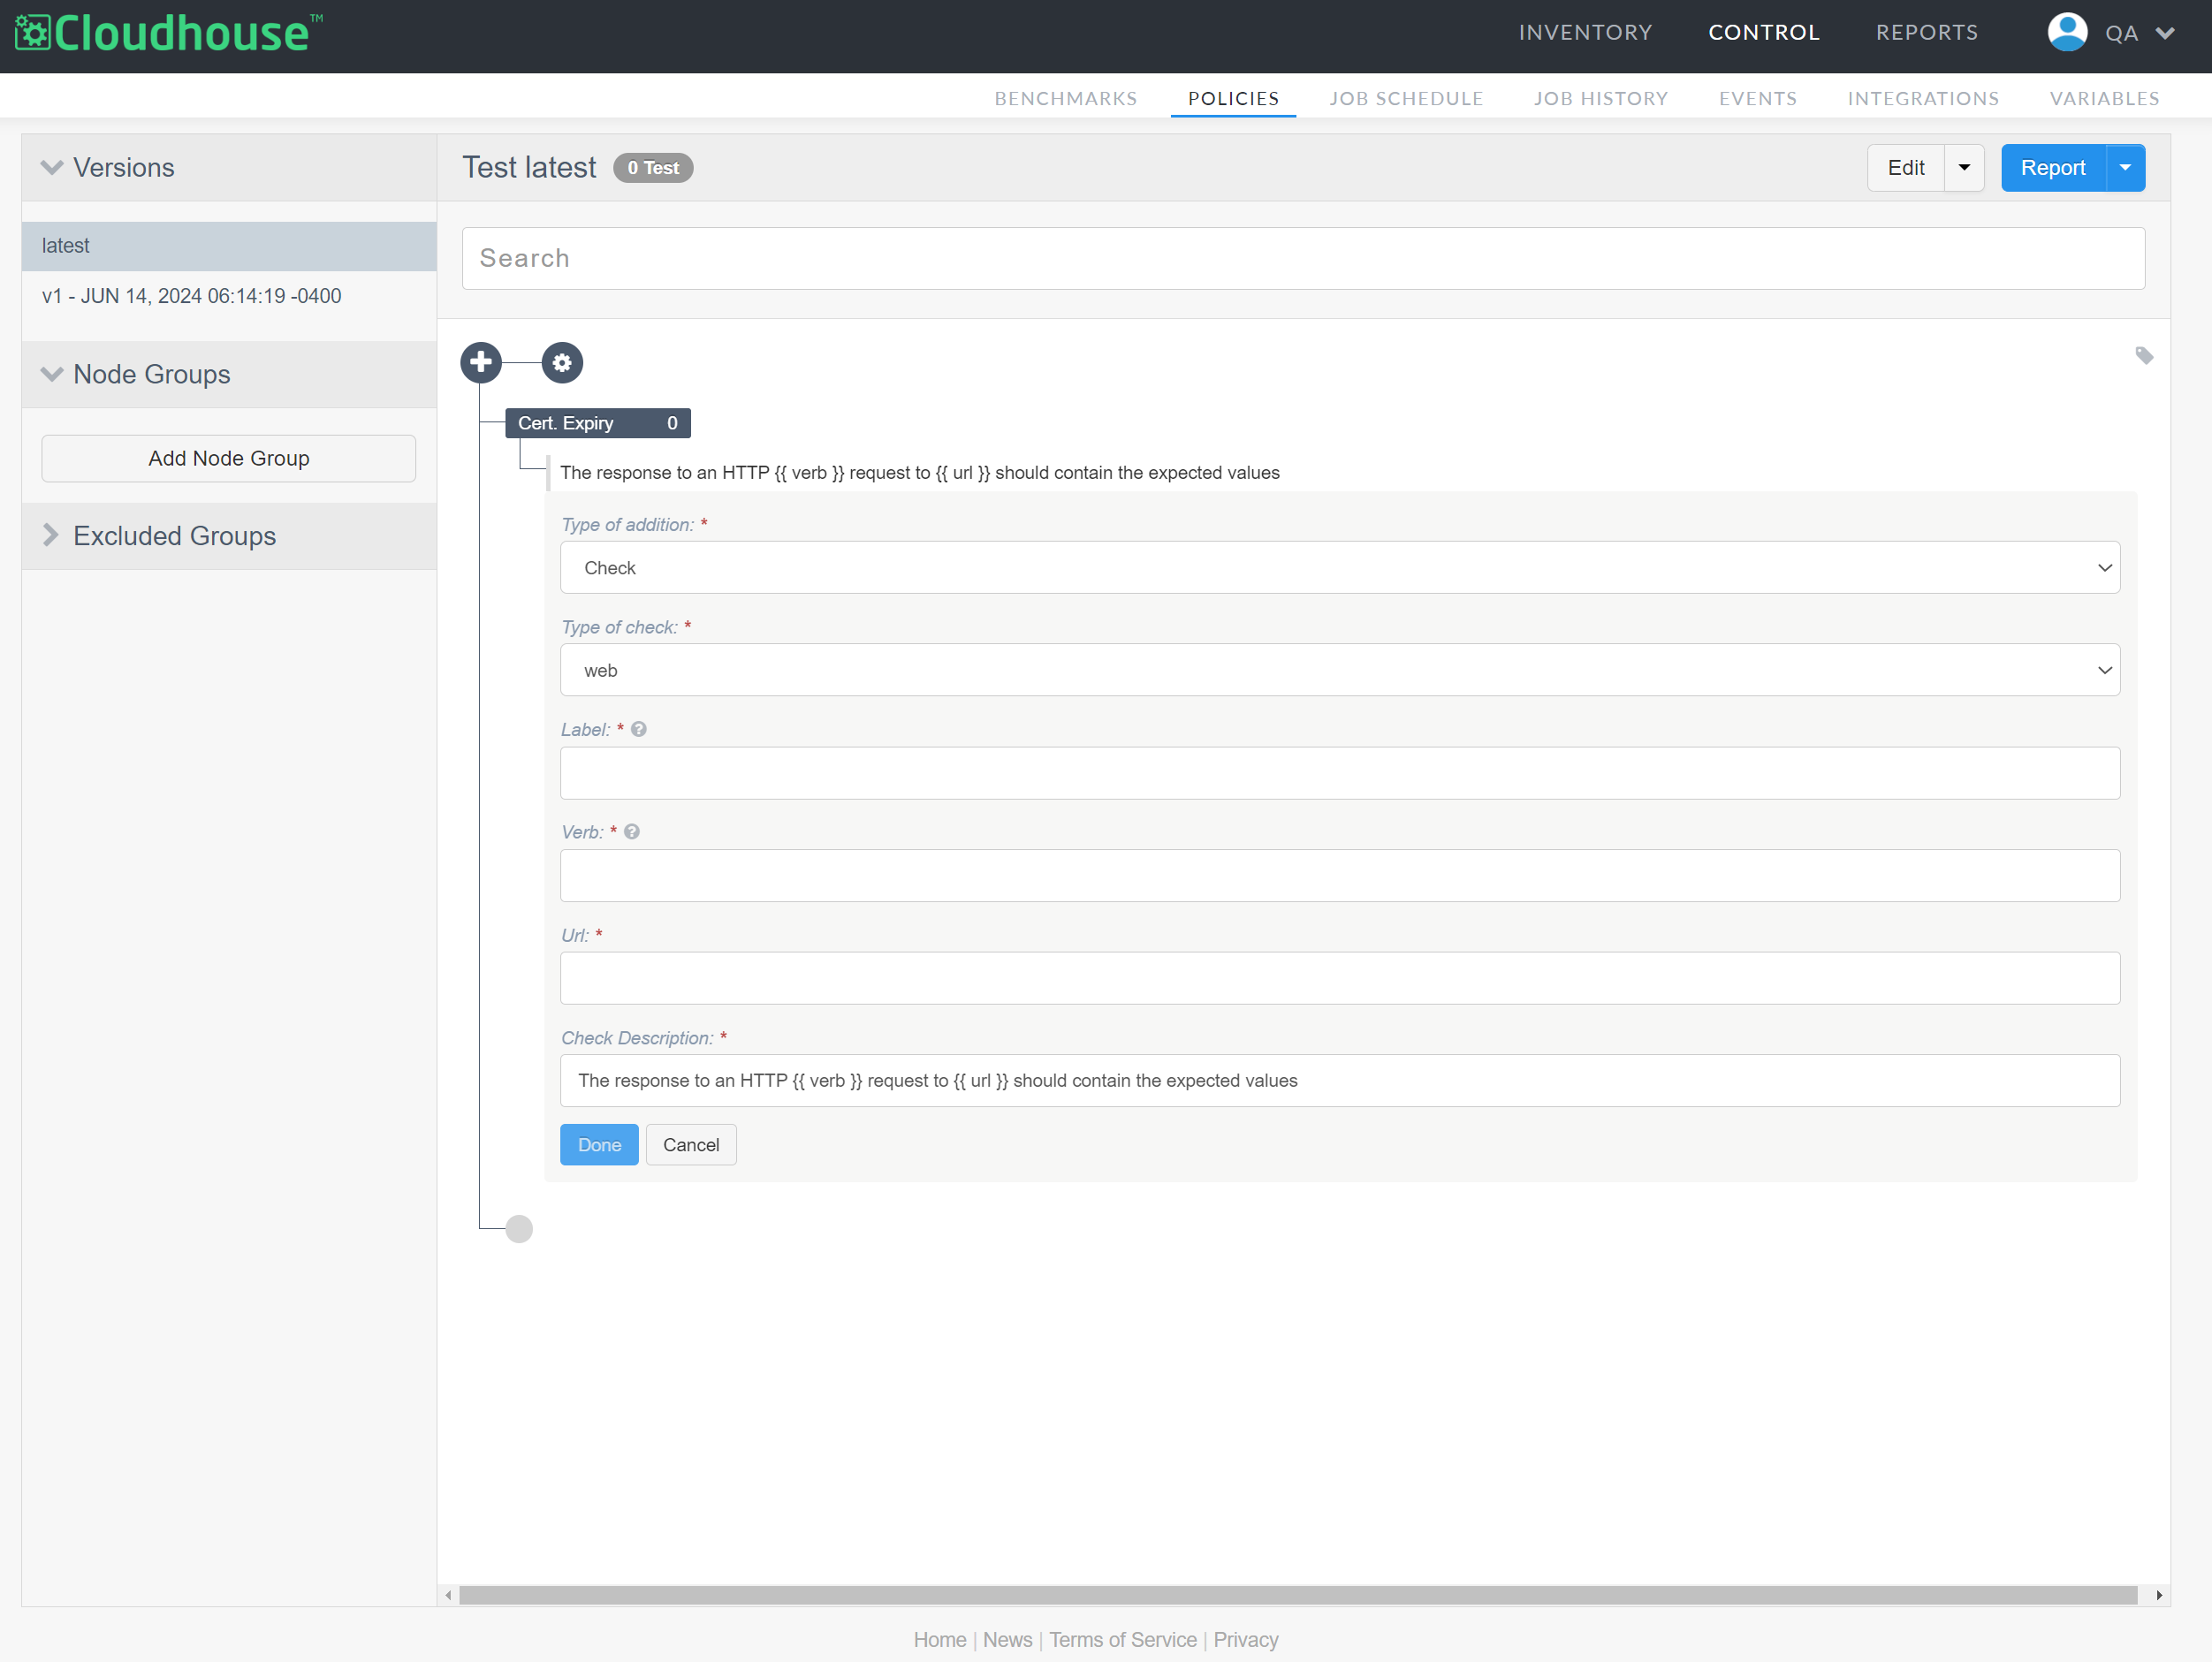
Note: Depending on the type of check you selected, the fields displayed here vary. In the example above, the 'web' check has been selected.
-
Once complete, click Done to add the check to the section.
After defining the item to be checked, you can stipulate what you want Guardian to check for when scanning the item. By default, Guardian runs a check to determine whether the item you defined is Present during the scan. To configure that default value, see below. Additionally, you can add an Attribute Checks to define a different expected value to be checked during the scan.
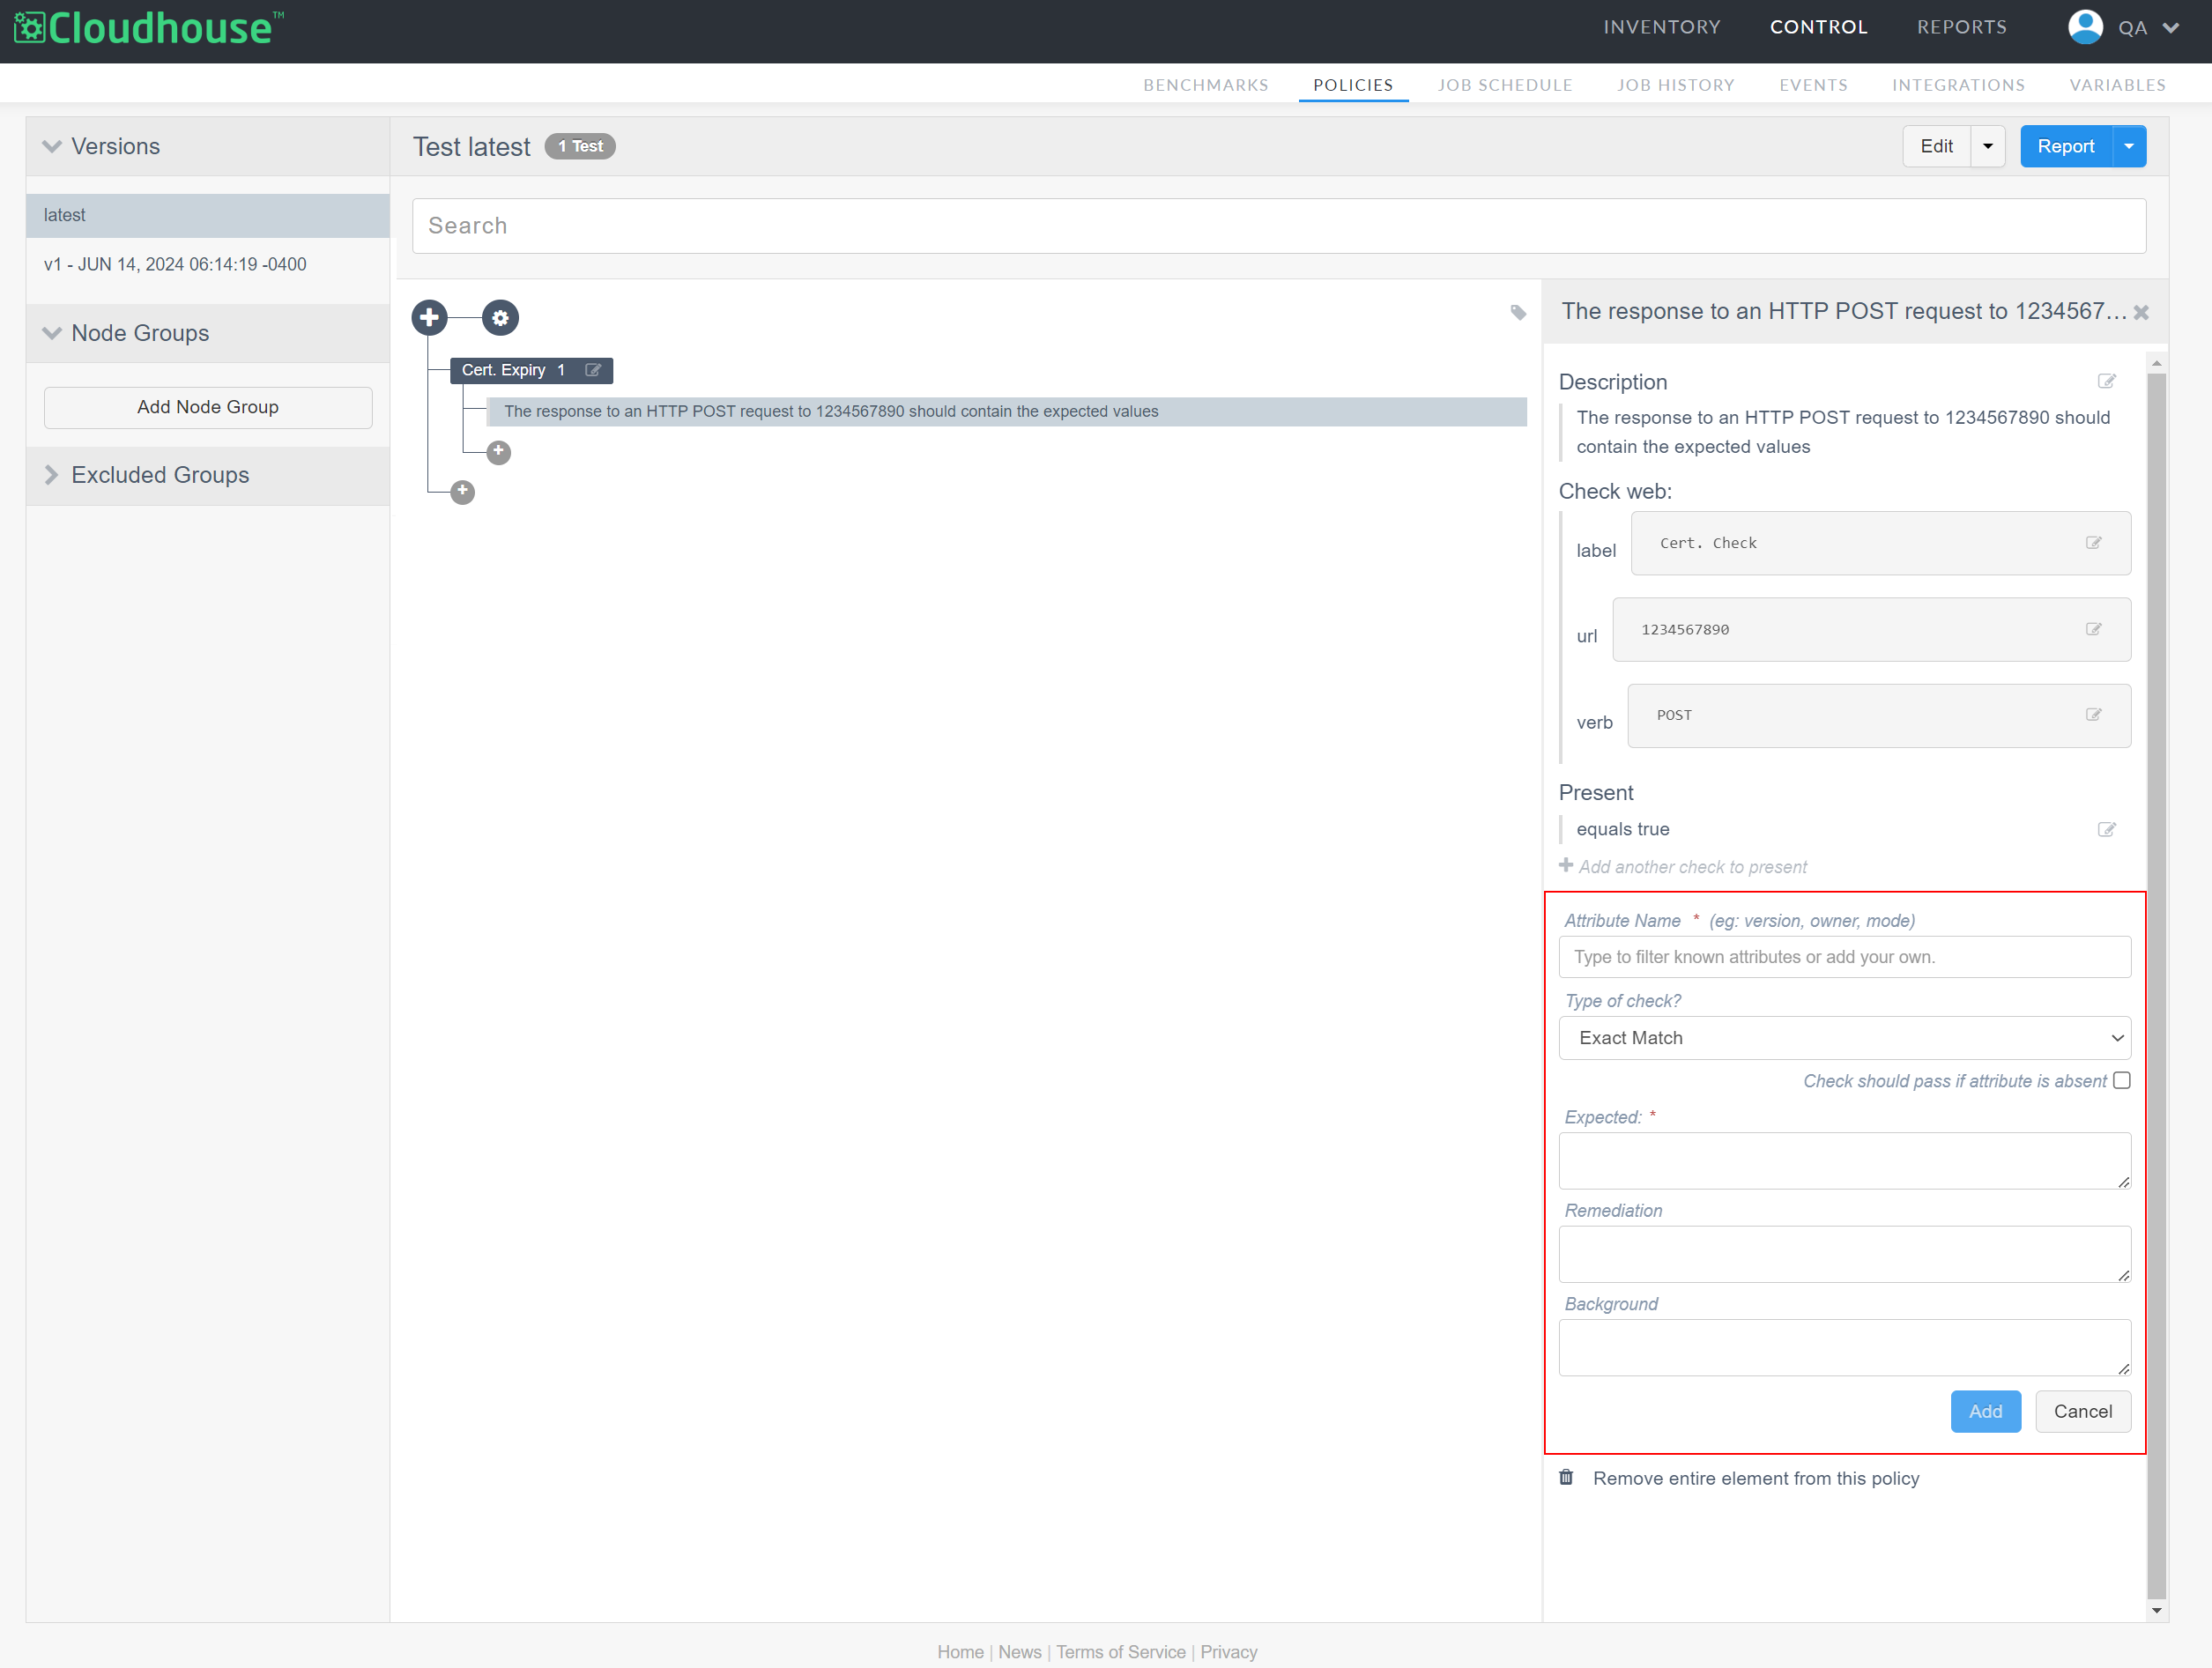
Attribute Checks
When you add a check, you define the item that you want to be scanned as part of the policy. Attribute checks are used to define an expected value or condition of the item, such as a version number or the presence (or absence) of a specific attribute. Then, when the node is scanned you can see whether the configuration item passed or failed the check for that particular condition. For example, the default attribute check Guardian runs for all policies is to determine whether the item(s) you defined are present on the node during the scan.
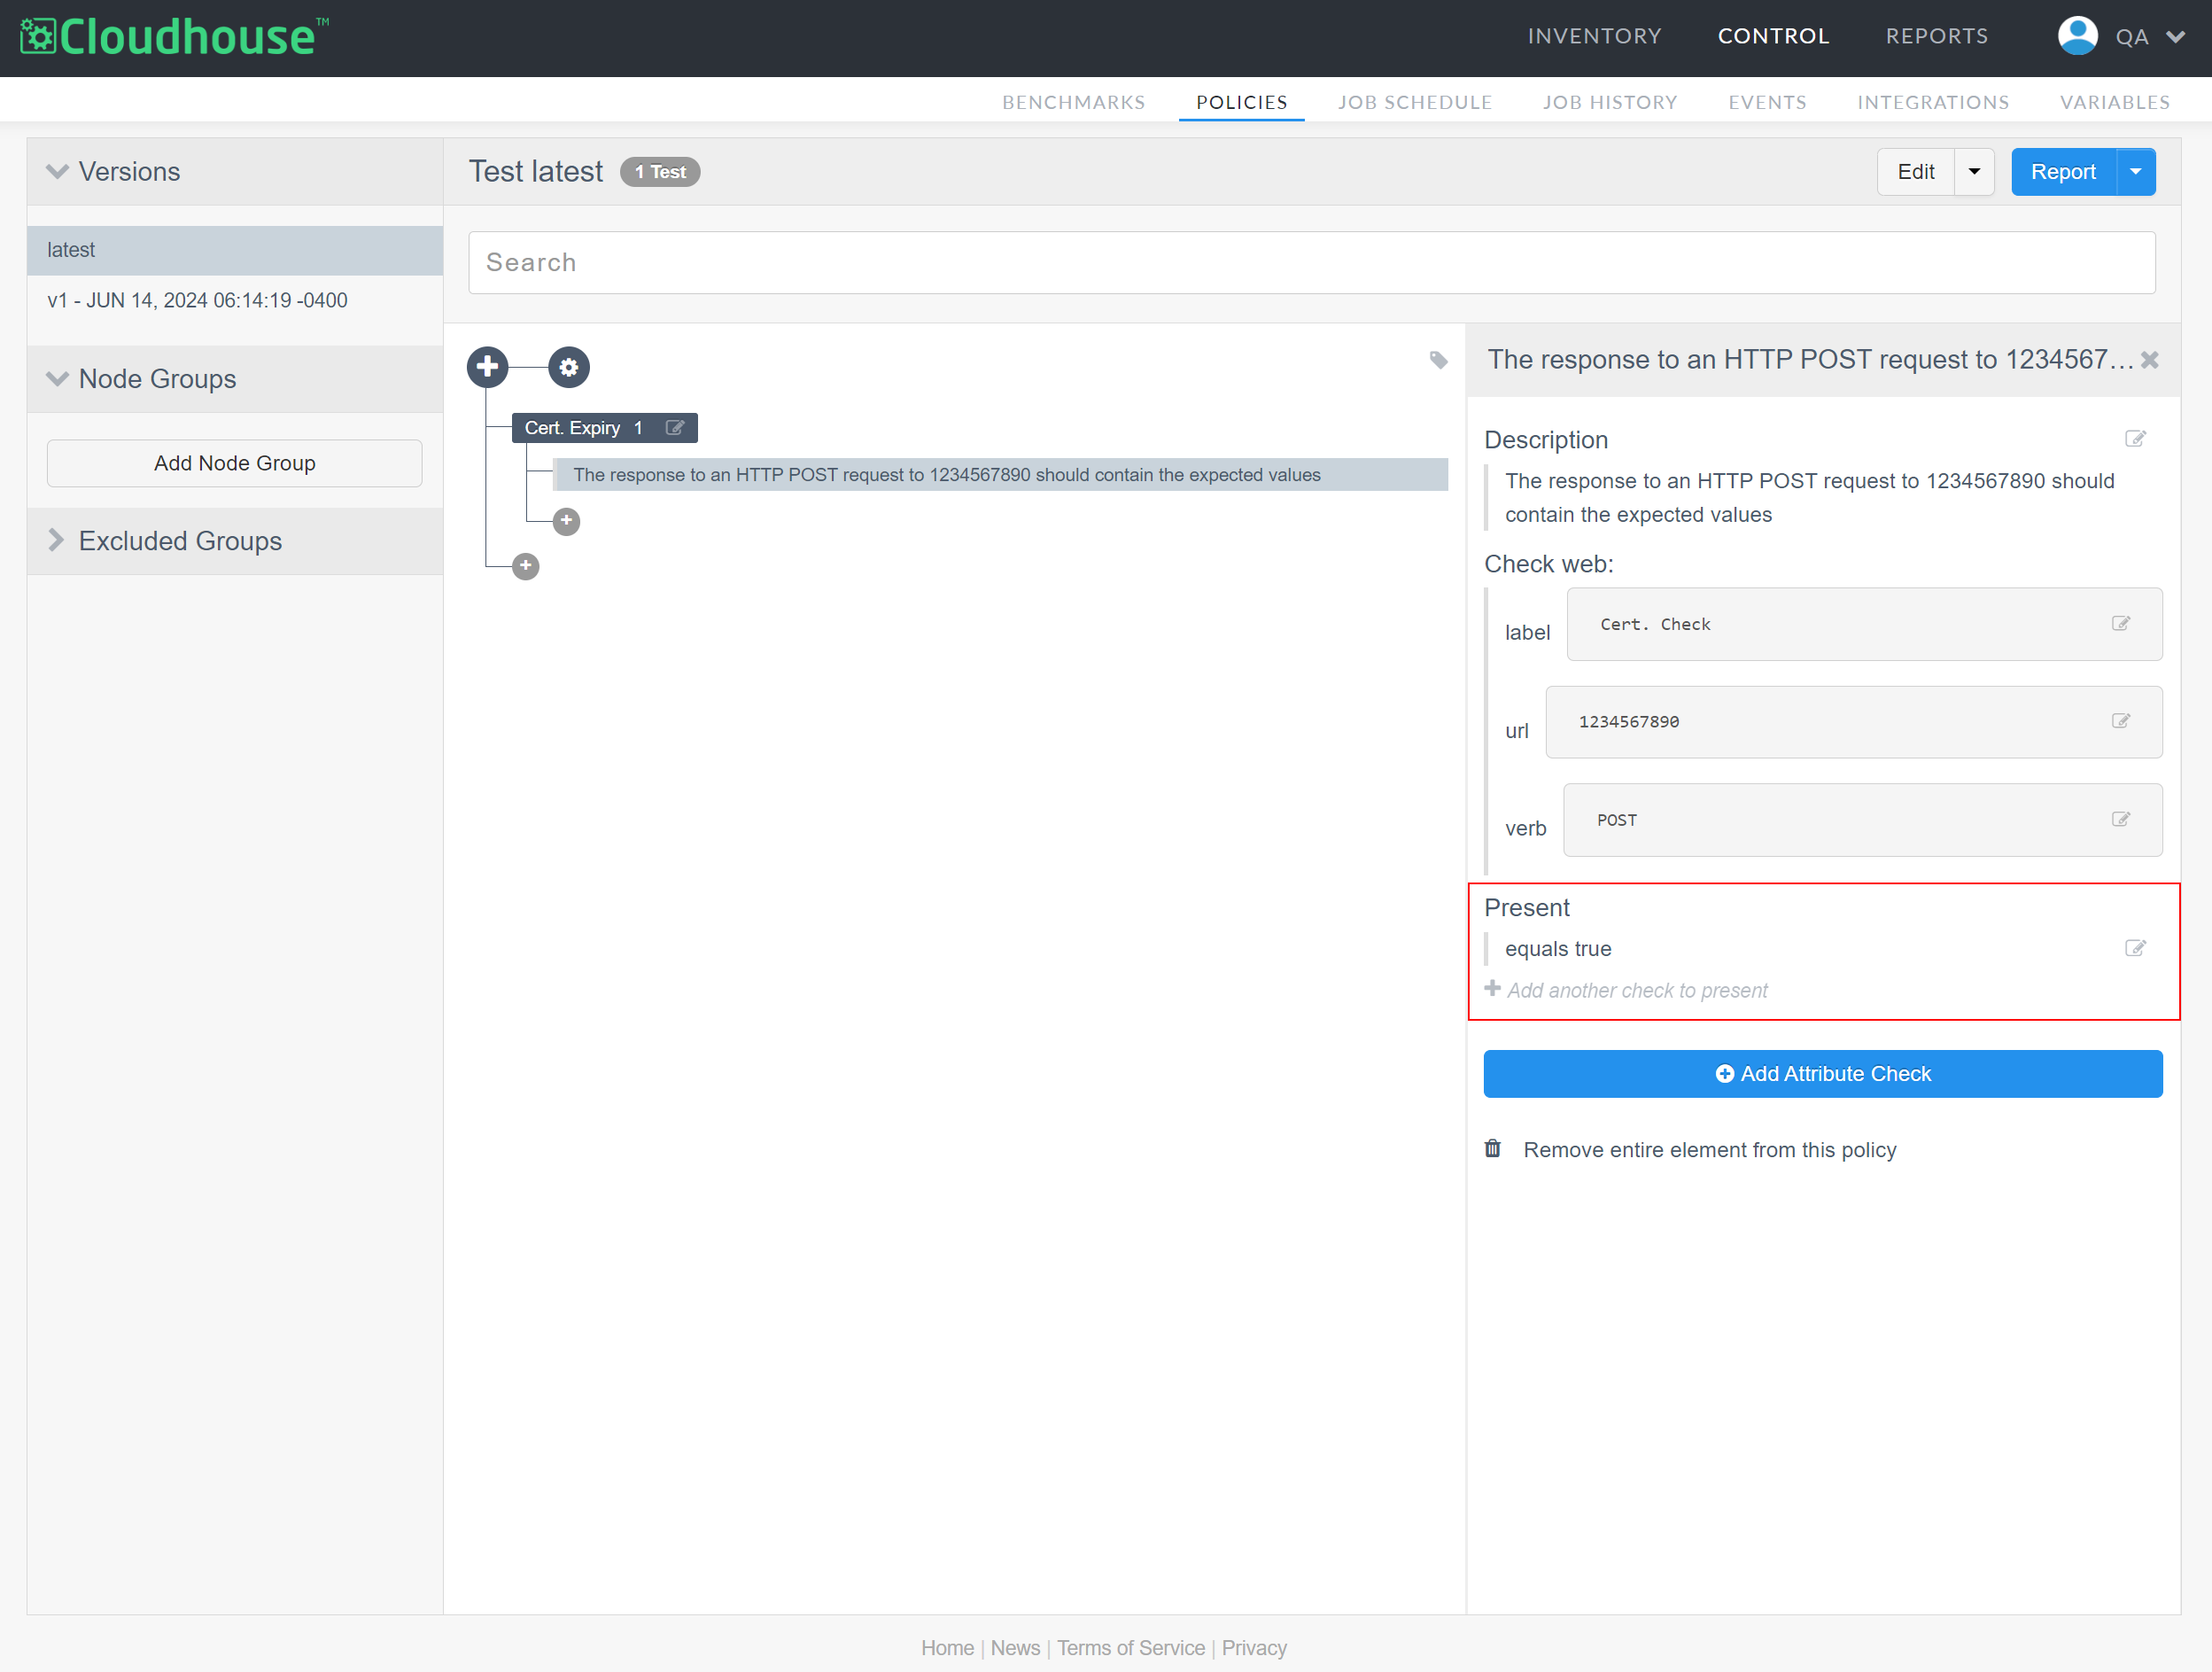
You can set the expected value to be 'true' – meaning that it should be present – or 'false' – meaning that it should not be present during the scan. If the item matches the expected value, it will 'Pass' the check or 'Fail' if it does not. For more information on the available attribute checks, see Policy Attribute Checks.
Note: By default, this attribute is set to 'true'. You can change this value at any time by clicking the Edit button ( )and changing the Expected field value to 'false'.
In addition to the default check, you can add an attribute check by completing the following steps:
-
Within an existing section, select the check that you want to add an attribute check to. A side panel is displayed.
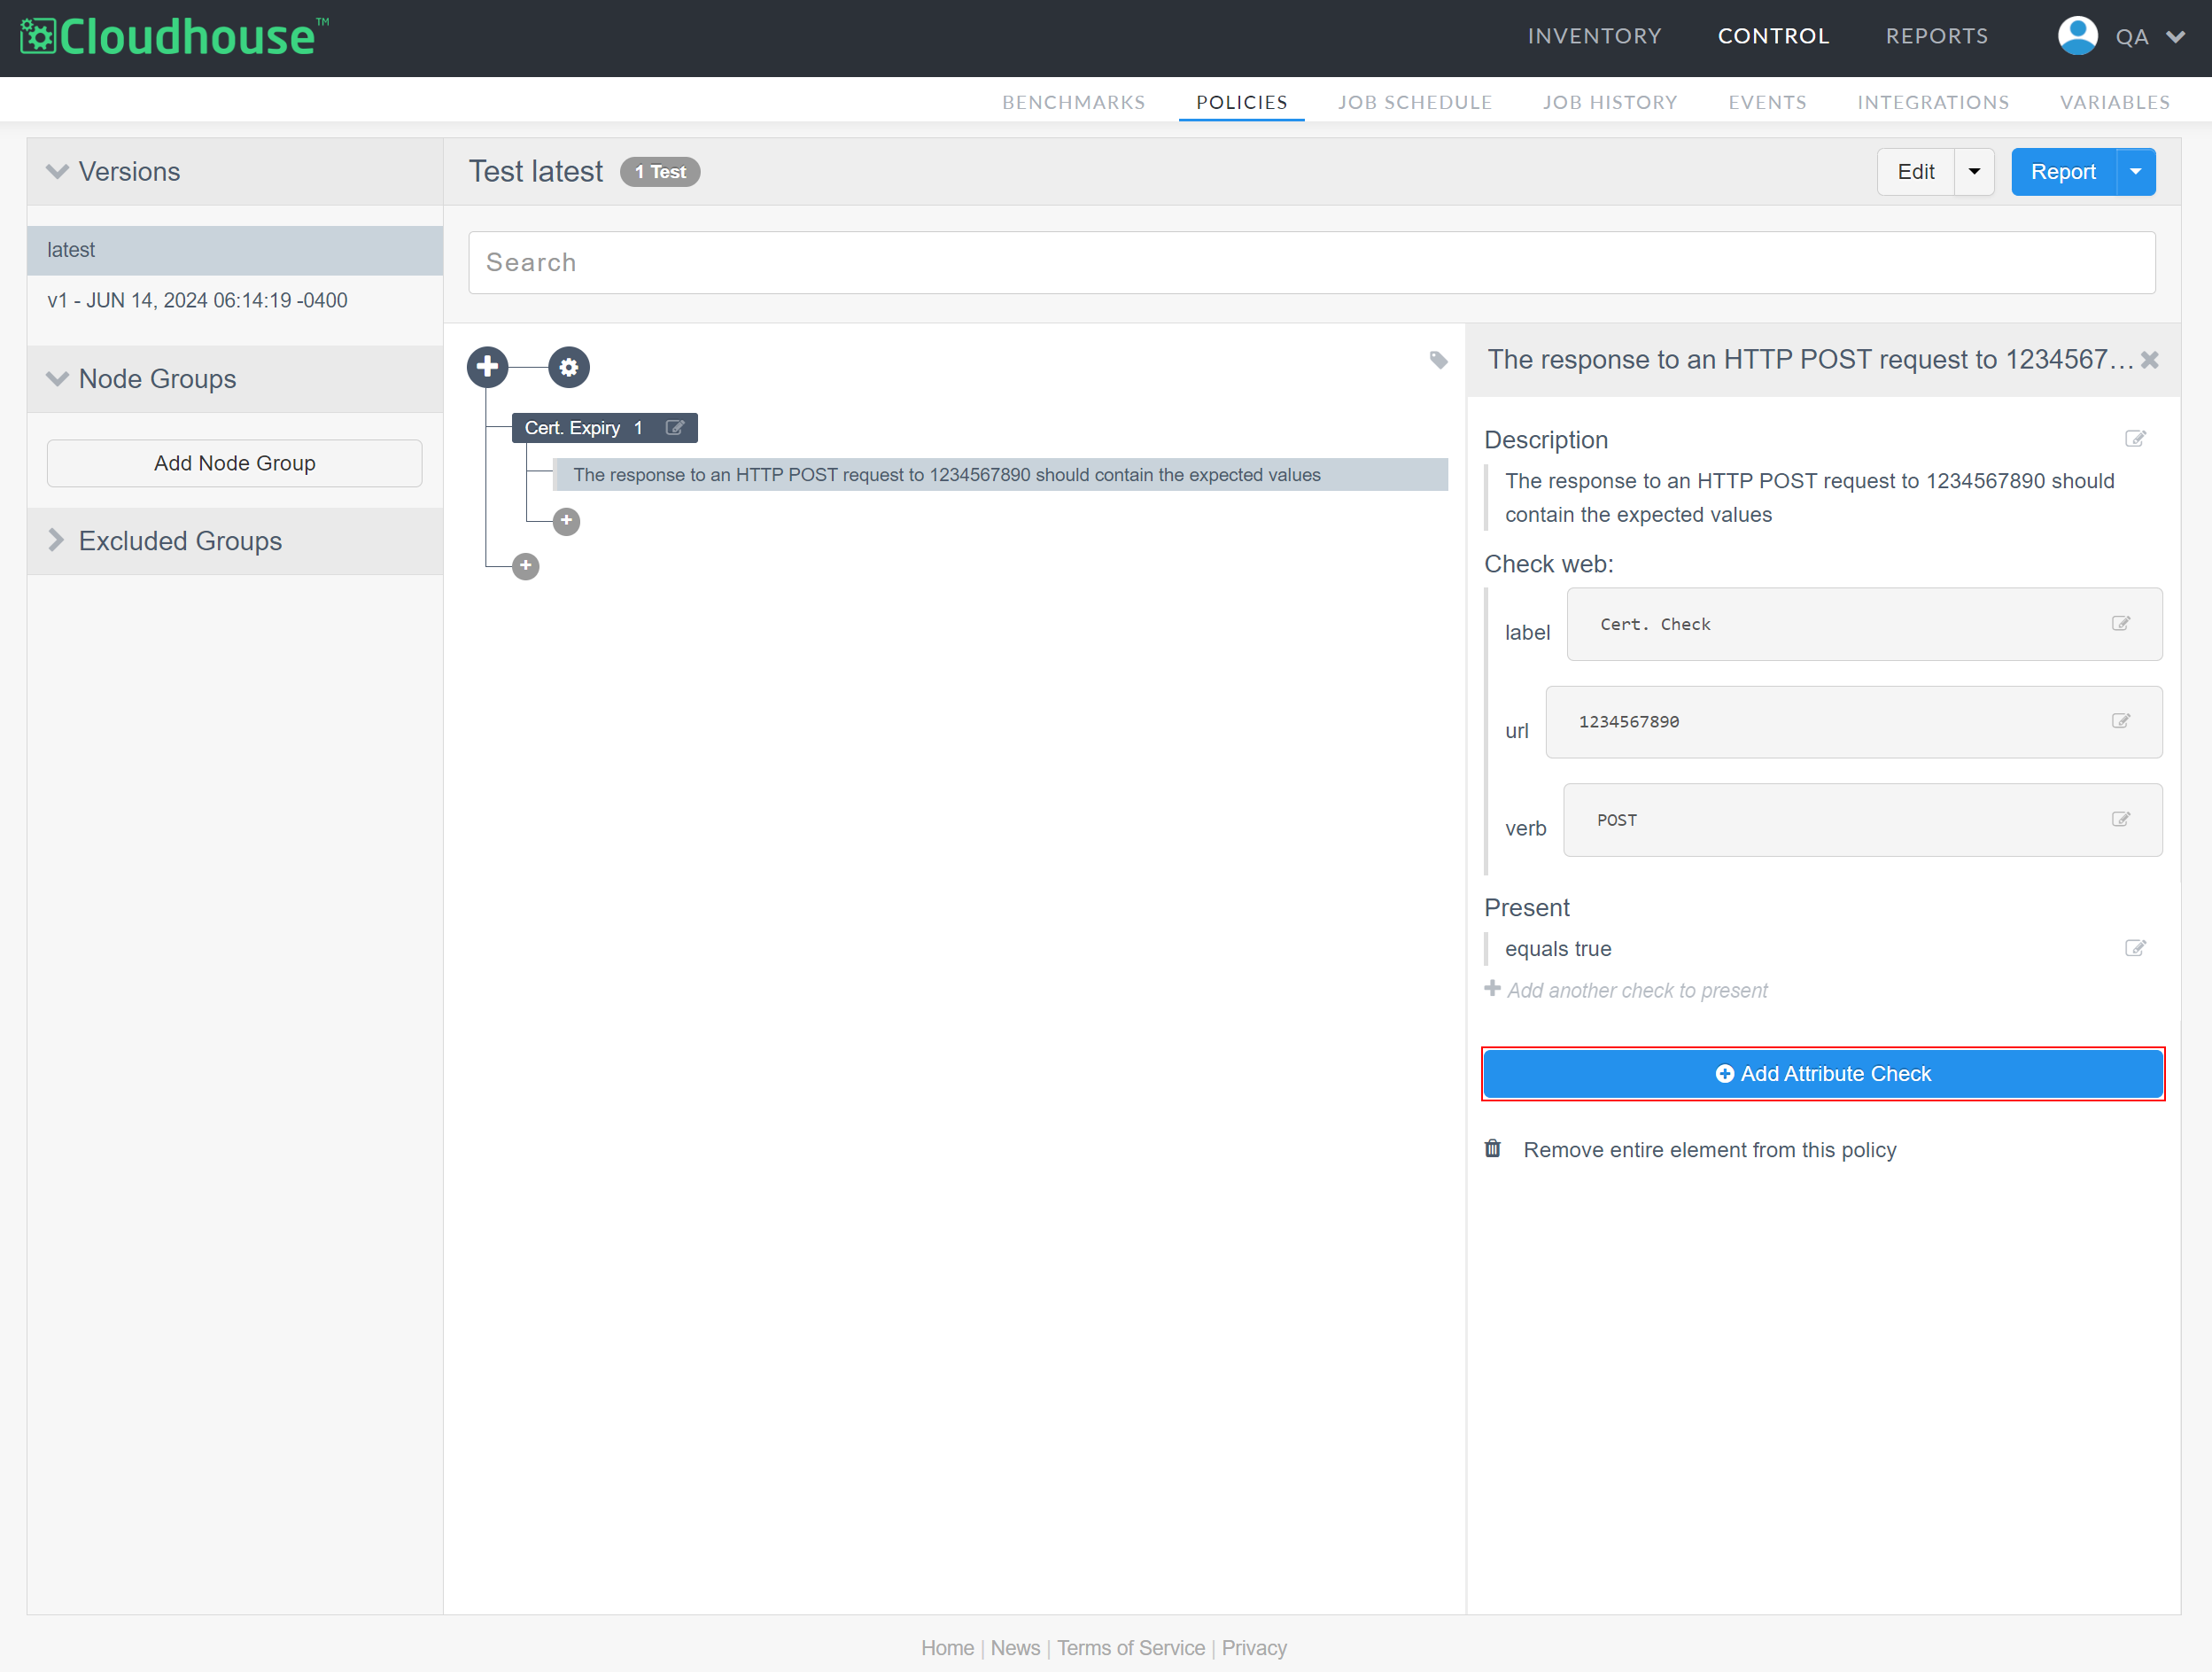
-
Click the Add Attribute Check button. Several fields are displayed.
-
The following options are displayed, enter a value in each of the relevant sections:
Option Description Attribute name field The name of the attribute to be checked. Select a value from the drop-down list or enter the name of the attribute exactly as it appears.
Warning: If the attribute name is typed incorrectly, the check may become redundant.
Type of check? drop-down list The type of check to be run. The following options are available to select from the drop-down list:
Tip: For more information on each of the check types described below, see Policy Attribute Checks.
-
'Exact Match' – The item to be checked must contain an exact match for the Expected attribute value (defined in the Expected field) otherwise the check will fail.
-
'Includes' – The item to be checked must include the Expected attribute value (defined in the Expected field) otherwise the check will fail.
Note: You can provide a comma-separated list of values to check.
-
'Excludes' – The item to be checked must not include the Expected attribute value (defined in the Expected field) otherwise the check will fail.
Note: You can provide a comma-separated list of values to check.
-
'XPath' – Find elements within an XML file (such as a
web.configfile) to verify that a path exists. If the correct path is not present, the check will fail.Note: The value of the element is not scanned as part of this check.
-
'>, >=, <, <=' – The item to be checked must be greater than, less than, equal to etc. the Expected conditions for value attribute otherwise the check will fail.
-
'Regular Expression' – Search for text within an attribute value using a regular expression. Define the criteria for the attribute check using the Expected conditions for value options. Here, you can define whether the Expected collected value should be greater than or less than the attribute value.
-
'Regular Expression (Excludes)' – Define text that should be excluded from an attribute value using a regular expression. Define the criteria for the attribute check using the Expected conditions for value options. Here, you can define whether the collected value should be greater than or less than the Expected attribute value.
-
'Time Comparison' – Specify whether an attribute value should be less or more than the provided date or time (before or after). If the criteria is met, the policy will pass.
-
'Version Comparison' – Specify if the attribute value should be less or more than the provided version. If the criteria is met, the policy will pass.
-
'Allow/Deny' – Specify if the attribute value should or should not match an entry within a specific list. If the criteria is met, the policy will pass.
Tip: Alternatively, select the Check should pass if attribute is absent check box to have the check pass if the Expected attribute is not present during the scan.
Expected field The expected value of the attribute. Enter the value of the attribute that you want to define a check for.
Note: This field is not displayed for '>, >=, <, <=', 'Time Comparison', 'Version Comparison', or 'Allow/Deny' check types. Instead, the Expected conditions for value options are displayed.
Expected conditions for value options Option to define the acceptance criteria for the expected attribute value.
Note: These options are not displayed for the 'Exact Match', 'Includes', or 'Excludes' check types.
Here, the following options are displayed:
-
Value must be drop-down list – Select one of the following values:
-
'>' – Greater than the expected value.
-
'>=' – Greater than, or equal to, the expected value.
-
'<' – Less than the expected value.
-
'<=' – Less than, or equal to, the expected value.
-
'=' – Equal to the expected value.
-
'!=' – Not equal to the expected value.
-
Value must be field – The value you want to define a check for (the 'expected value').
Allow/Deny options Option to define whether the expected attribute value should or should not match an entry within the list.
Note: This option is only displayed for the 'Allow/Deny' check type.
Here, the following options are displayed:
-
Allow/Deny drop-down list – Select 'Allow' or 'Deny' from the list to define whether the expected value should be present or not.
-
Allow/ Deny field – The value you want to define a check for (the 'expected value').
Remediation field Option to provide instructions on what to do if the policy is failing. The text provided here will be displayed on the node scan results page, if the policy is selected. This is not a command that will be run.
Tip: Providing instructions for policy failure remediation can enable users to resolve issues independently and more efficiently.
Background field Option to provide an explanation for the check, such as the purpose it serves. The text provided here will be displayed on the node scan results page, if the policy is selected. This is not a command that will be run.
Tip: Providing background information for policy checks makes it easier to understand the purpose that each policy serves, without needing to assess the individual checks each time.
-
-
Once complete, click the Add button.
The attribute check is added and displayed on the policy. For more information on each of the check types, see Policy Attribute Checks. Alternatively, for information on how to use wildcards within your policy checks, see Wildcard Policies.
Note: Next you can begin adding node groups to your policy, see Add Benchmark / Policy to Node Group for more information.
Wildcard Policy
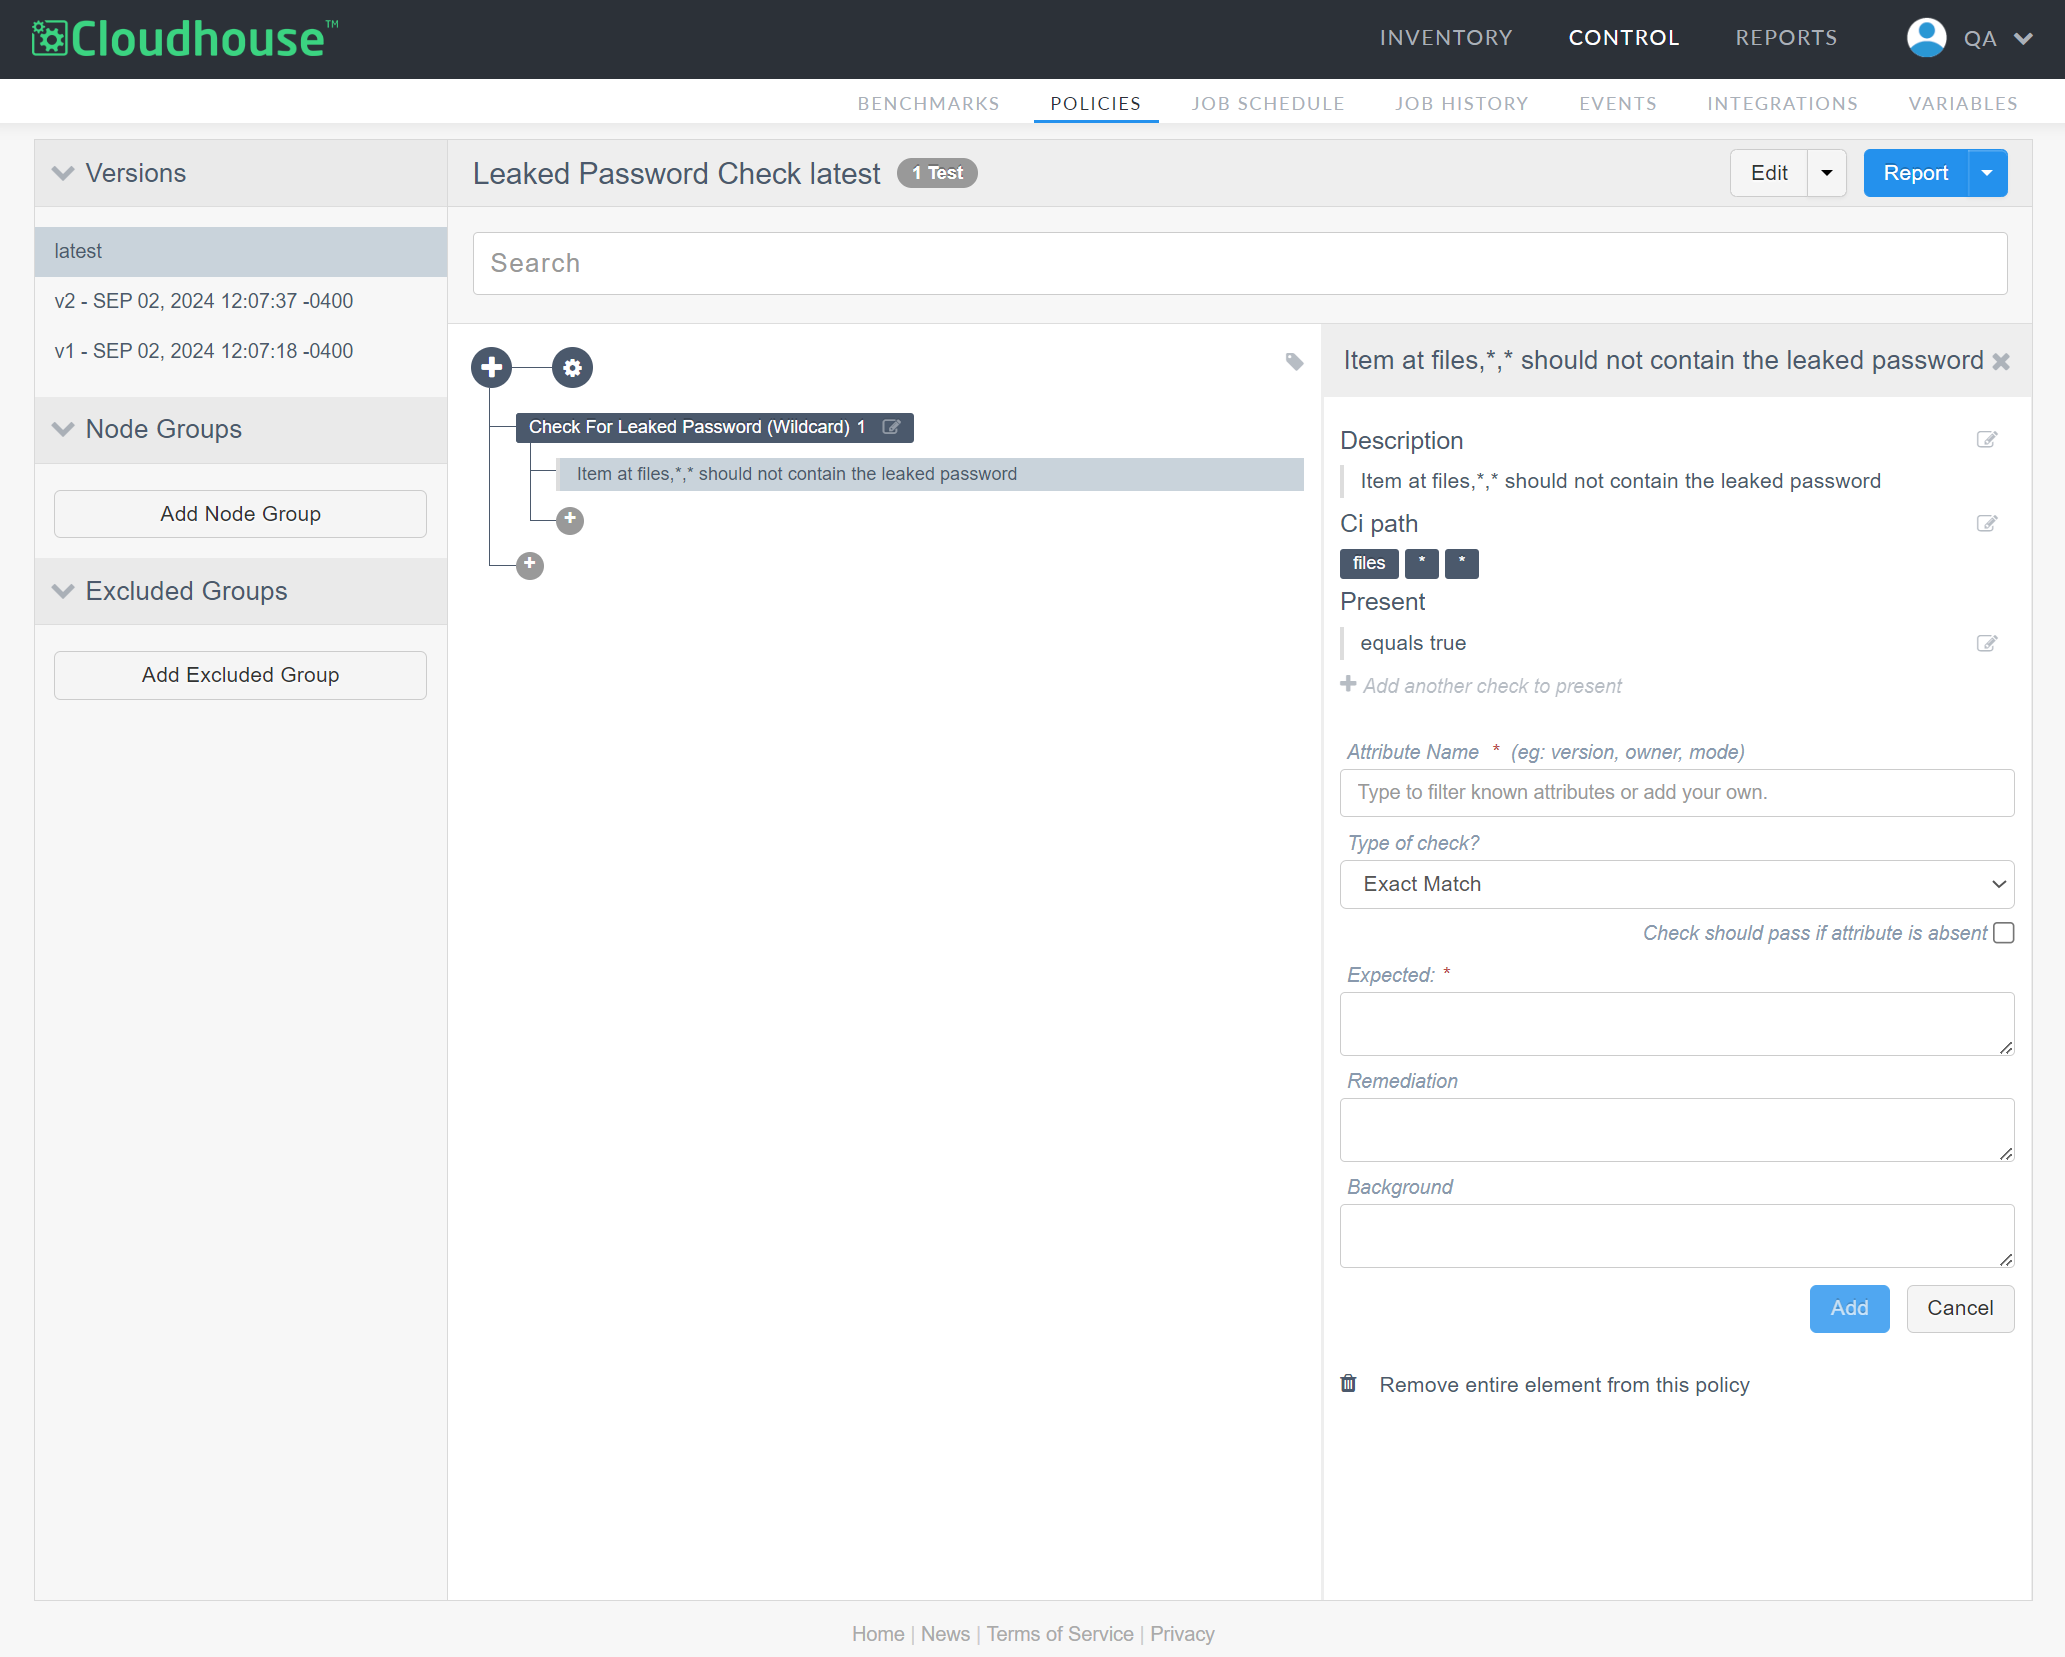
When building a custom policy, you can use wildcards to customize your checks. For example, you could create a policy that monitors all the files retrieved from a defined directory, or directories. If you experience a password leak, for example, you could configure Guardian to scan all files (within a specified directory) to see if they contain the leaked password.
To add the above wildcard attribute check to an existing policy, complete the following steps:
Tip: The following process specifically checks files within a directory. To ensure that the correct files are collected during a scan, make sure that the correct File and Directory paths are set within the Scan Options and that the Contents option is selected for each scan option. For more information, see Files.
-
Within an existing section, select 'other' from the Type of check drop-down list.
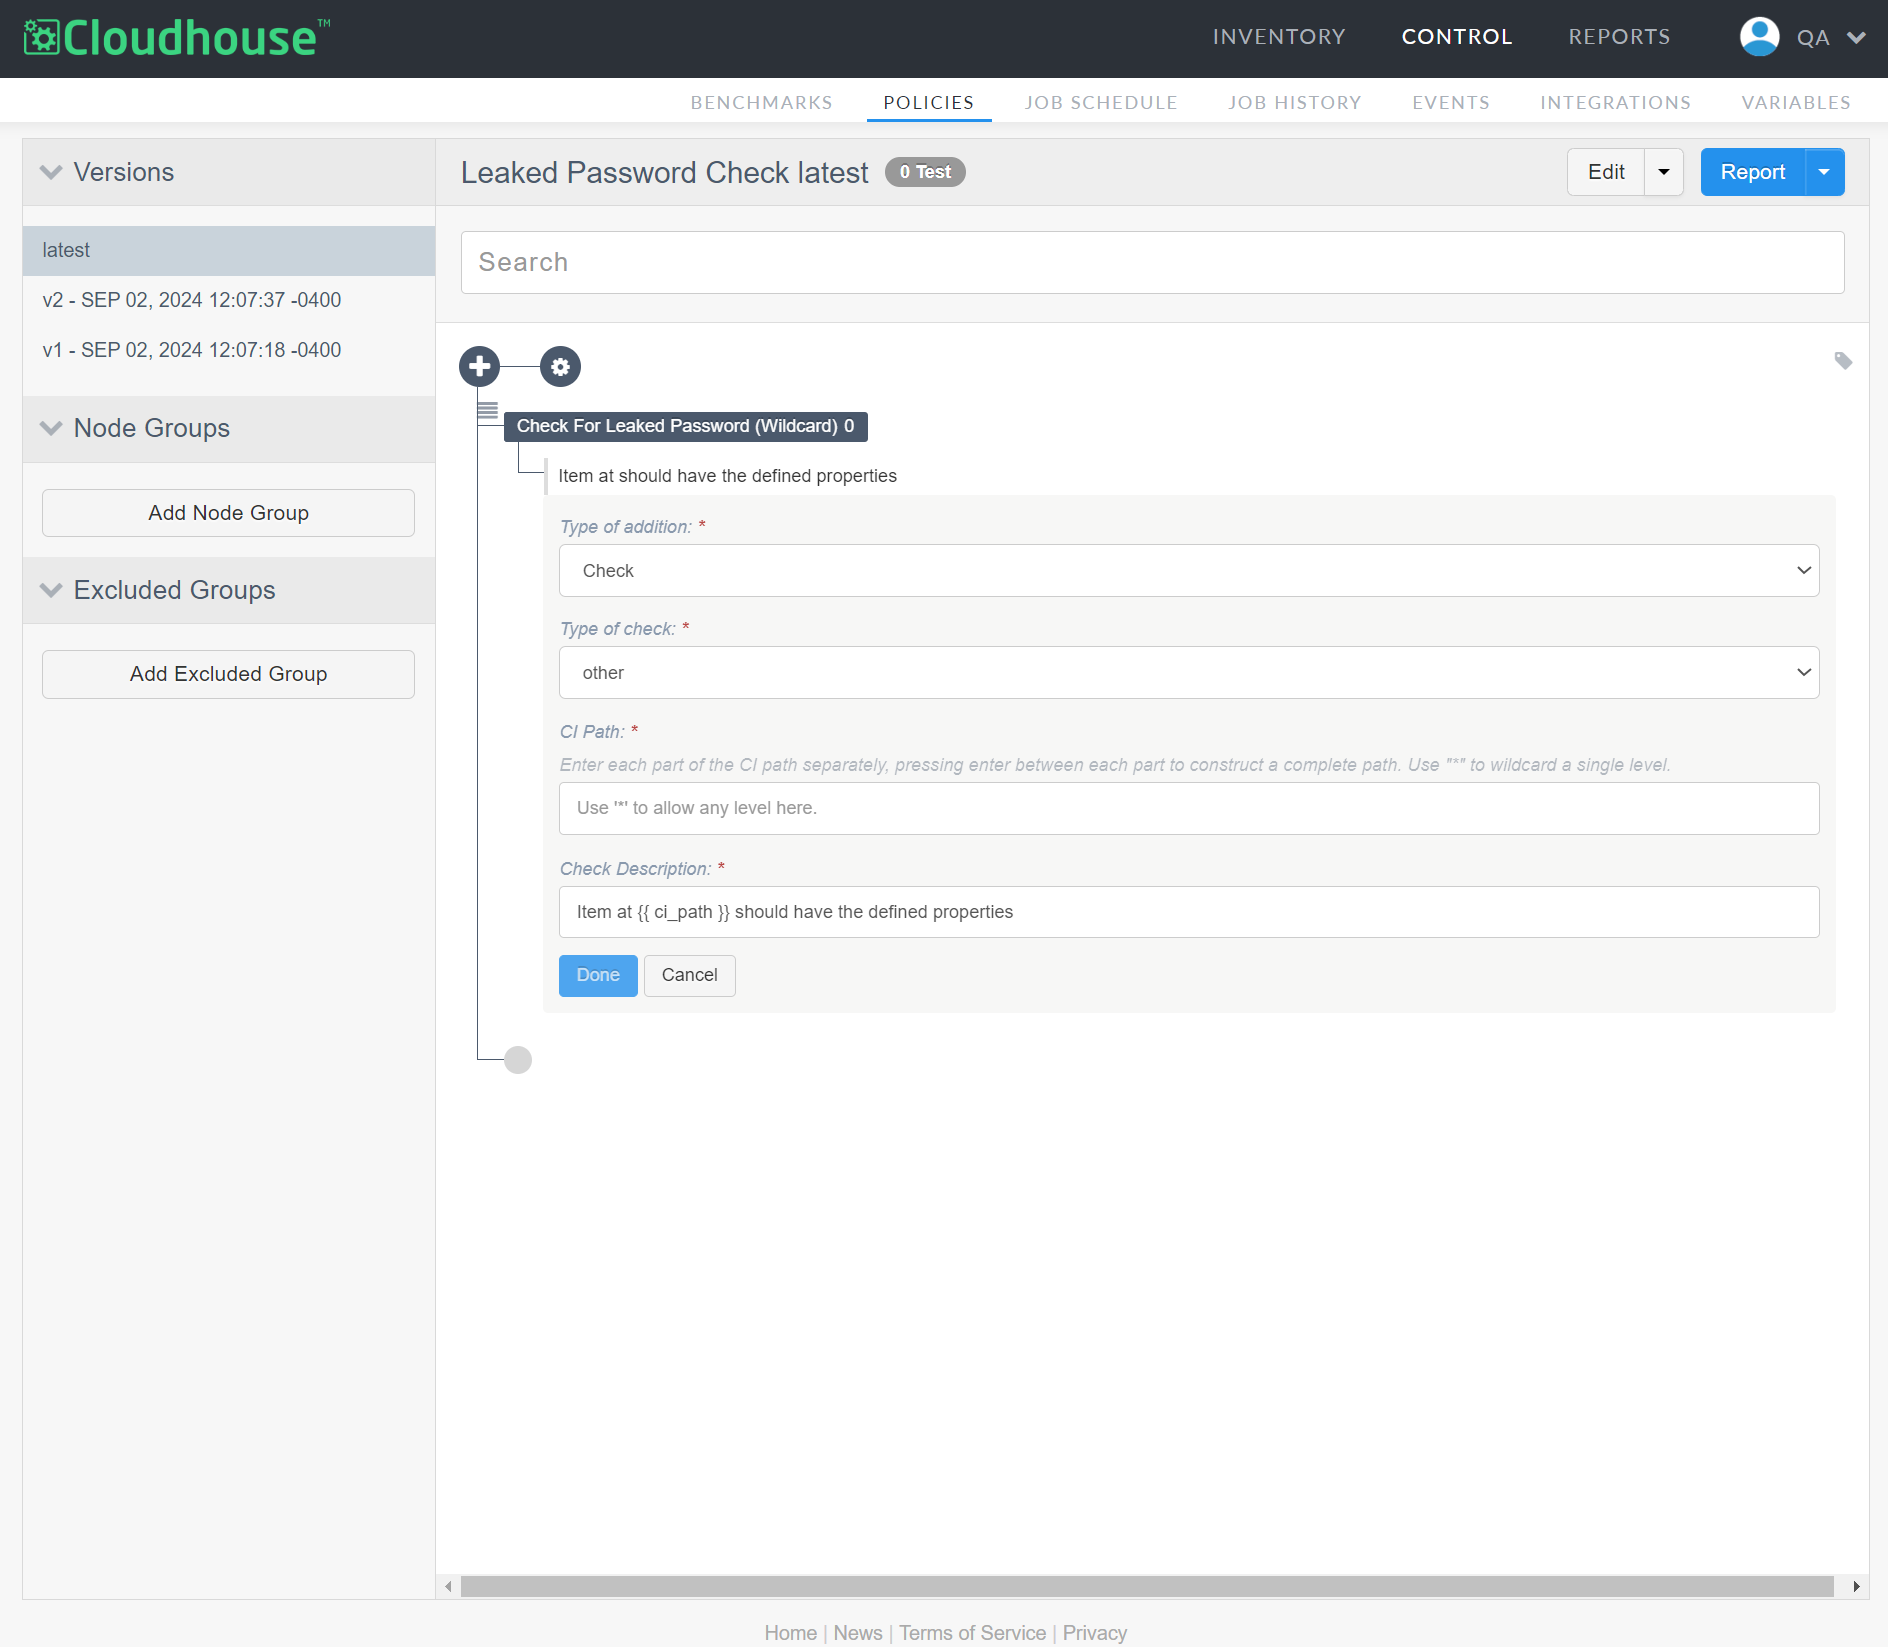
-
In the CI Path field, type 'files' and click Enter.
-
Then, type '*' and click Enter.
-
Once more, type '*' and click Enter.
Note: This will match all configuration items collected under a node scan from the Files section.
-
Once complete, click Done.
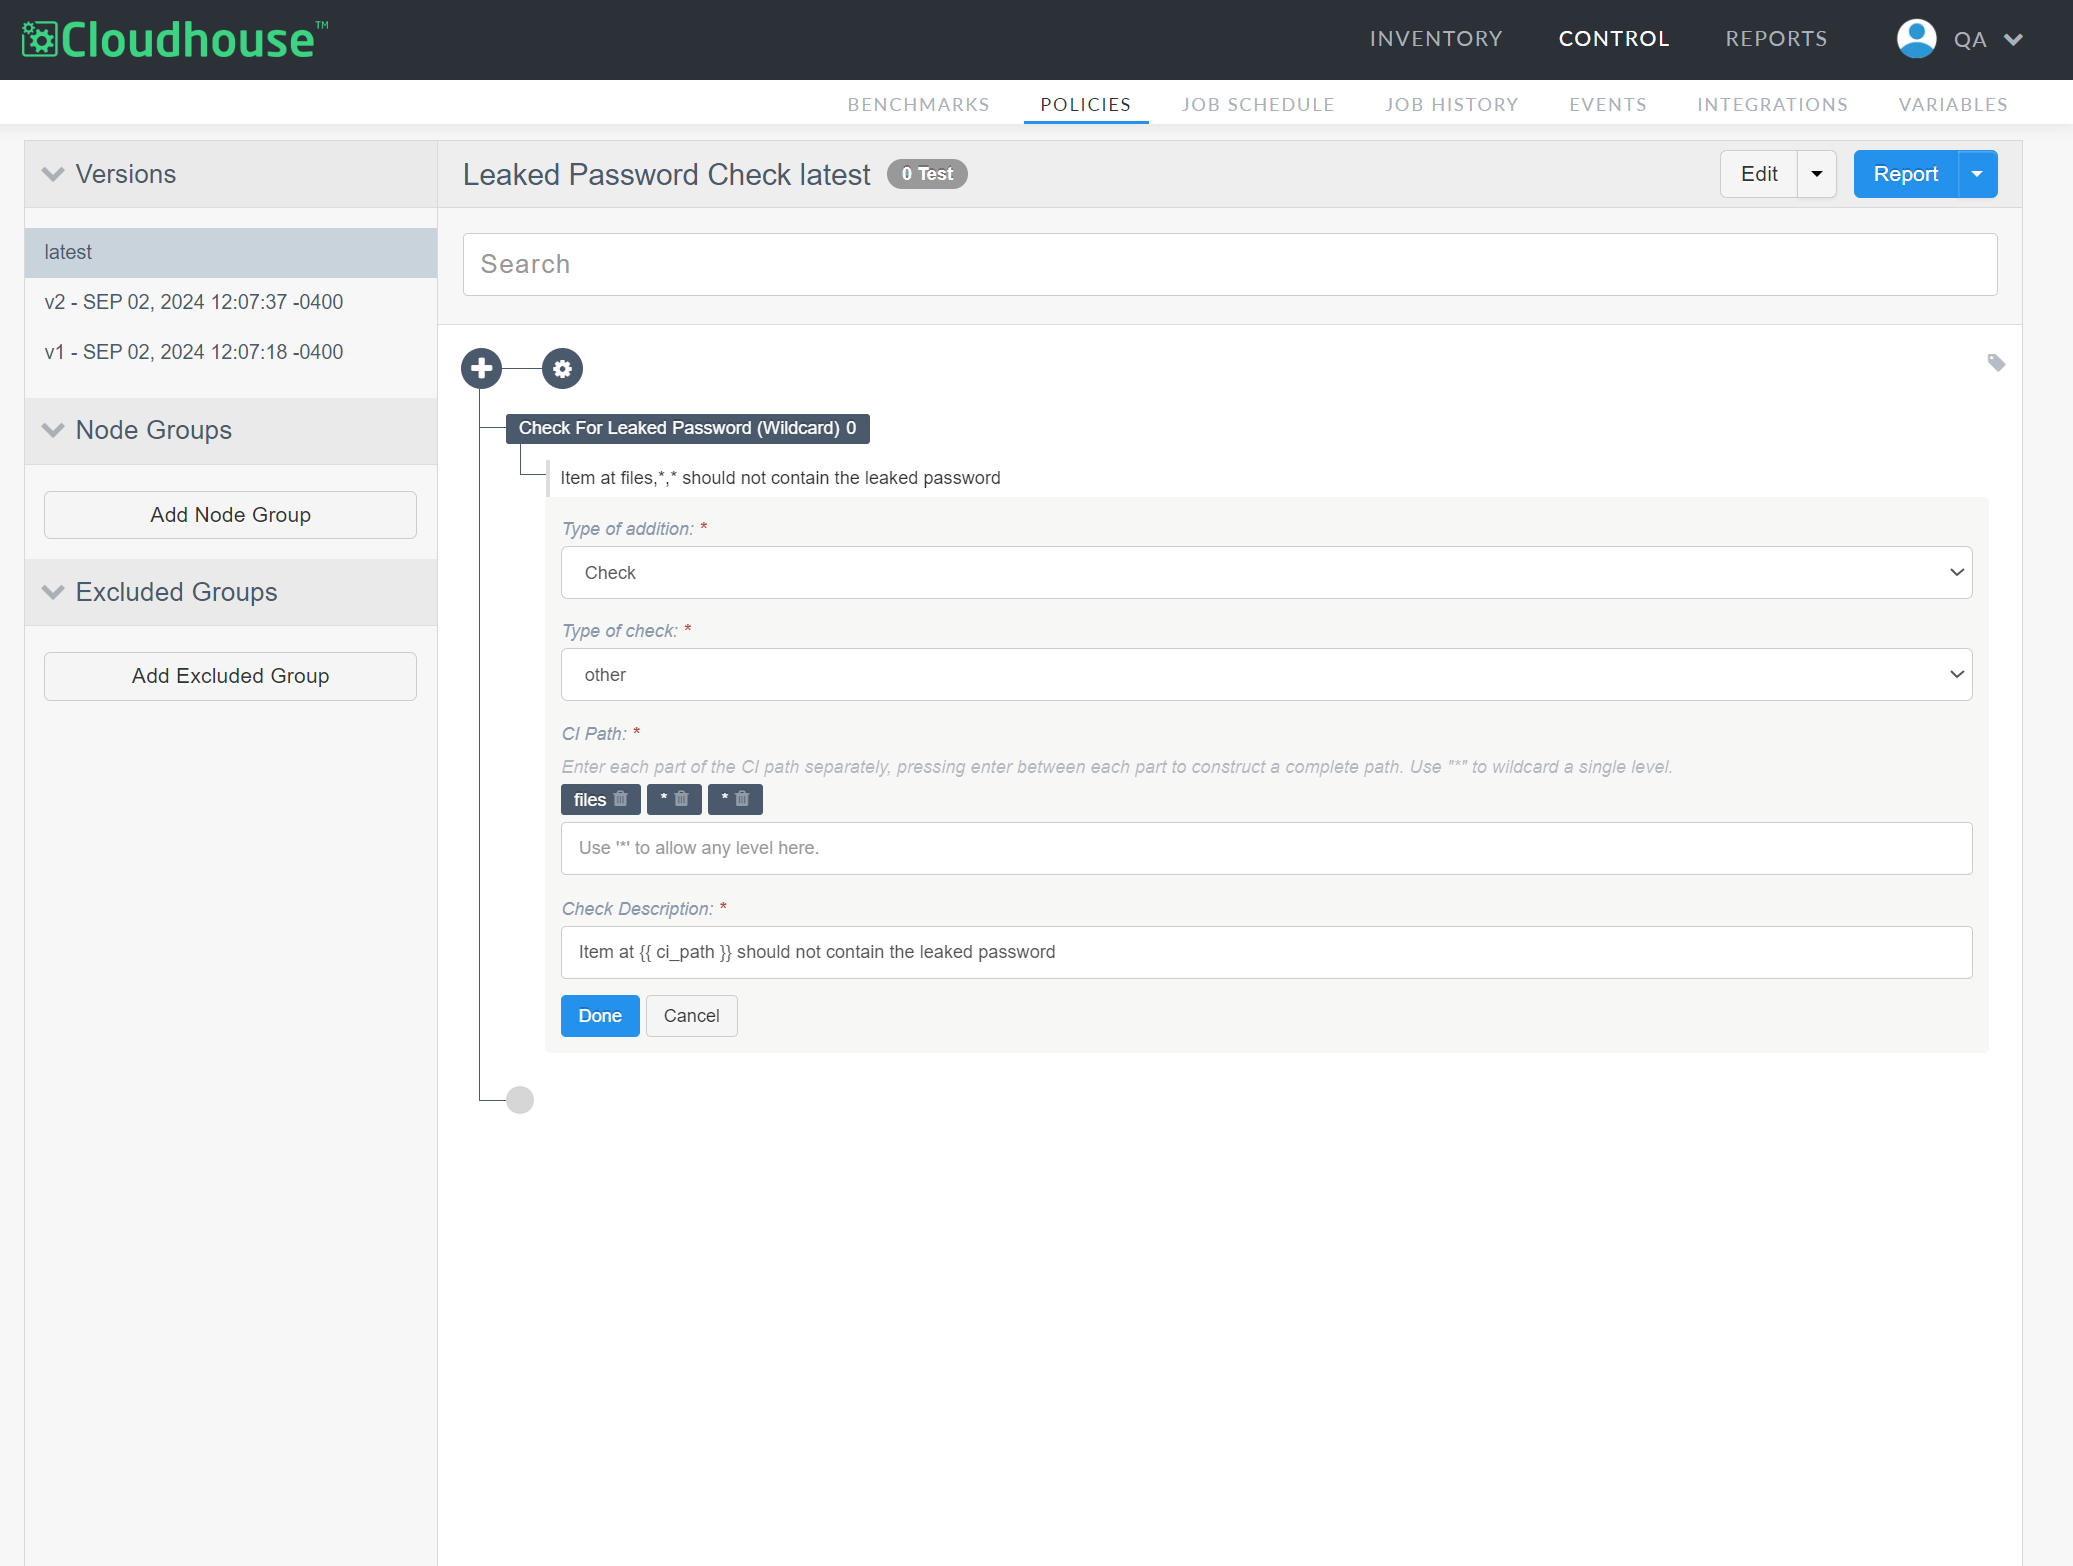
The wildcard check is then added to the policy. Next, you need to add an additional attribute check to further define the policy's acceptance criteria. In this scenario, we want to add an attribute check to make sure that a leaked password is not present within the file directories we stipulated in the previous section.
To add an additional attribute check for the above use case, complete the following steps:
-
Within the above section, select the check that you want to add an attribute check to. This should be the check that you just created. A side panel is then displayed.
-
Click the Add Attribute Check button. Several fields are displayed.
-
In the Attribute Name field, type 'raw'.
-
In the Type of check? drop-down list, select 'Excludes'.
-
In the Expected field, enter the text you want Guardian to search for. In this example, you would enter the leaked password. For example, 'ceoPassword123'.
-
Optionally, you can add a set of Remediation steps as well as some context in the Background field.
-
Once complete, click Add.
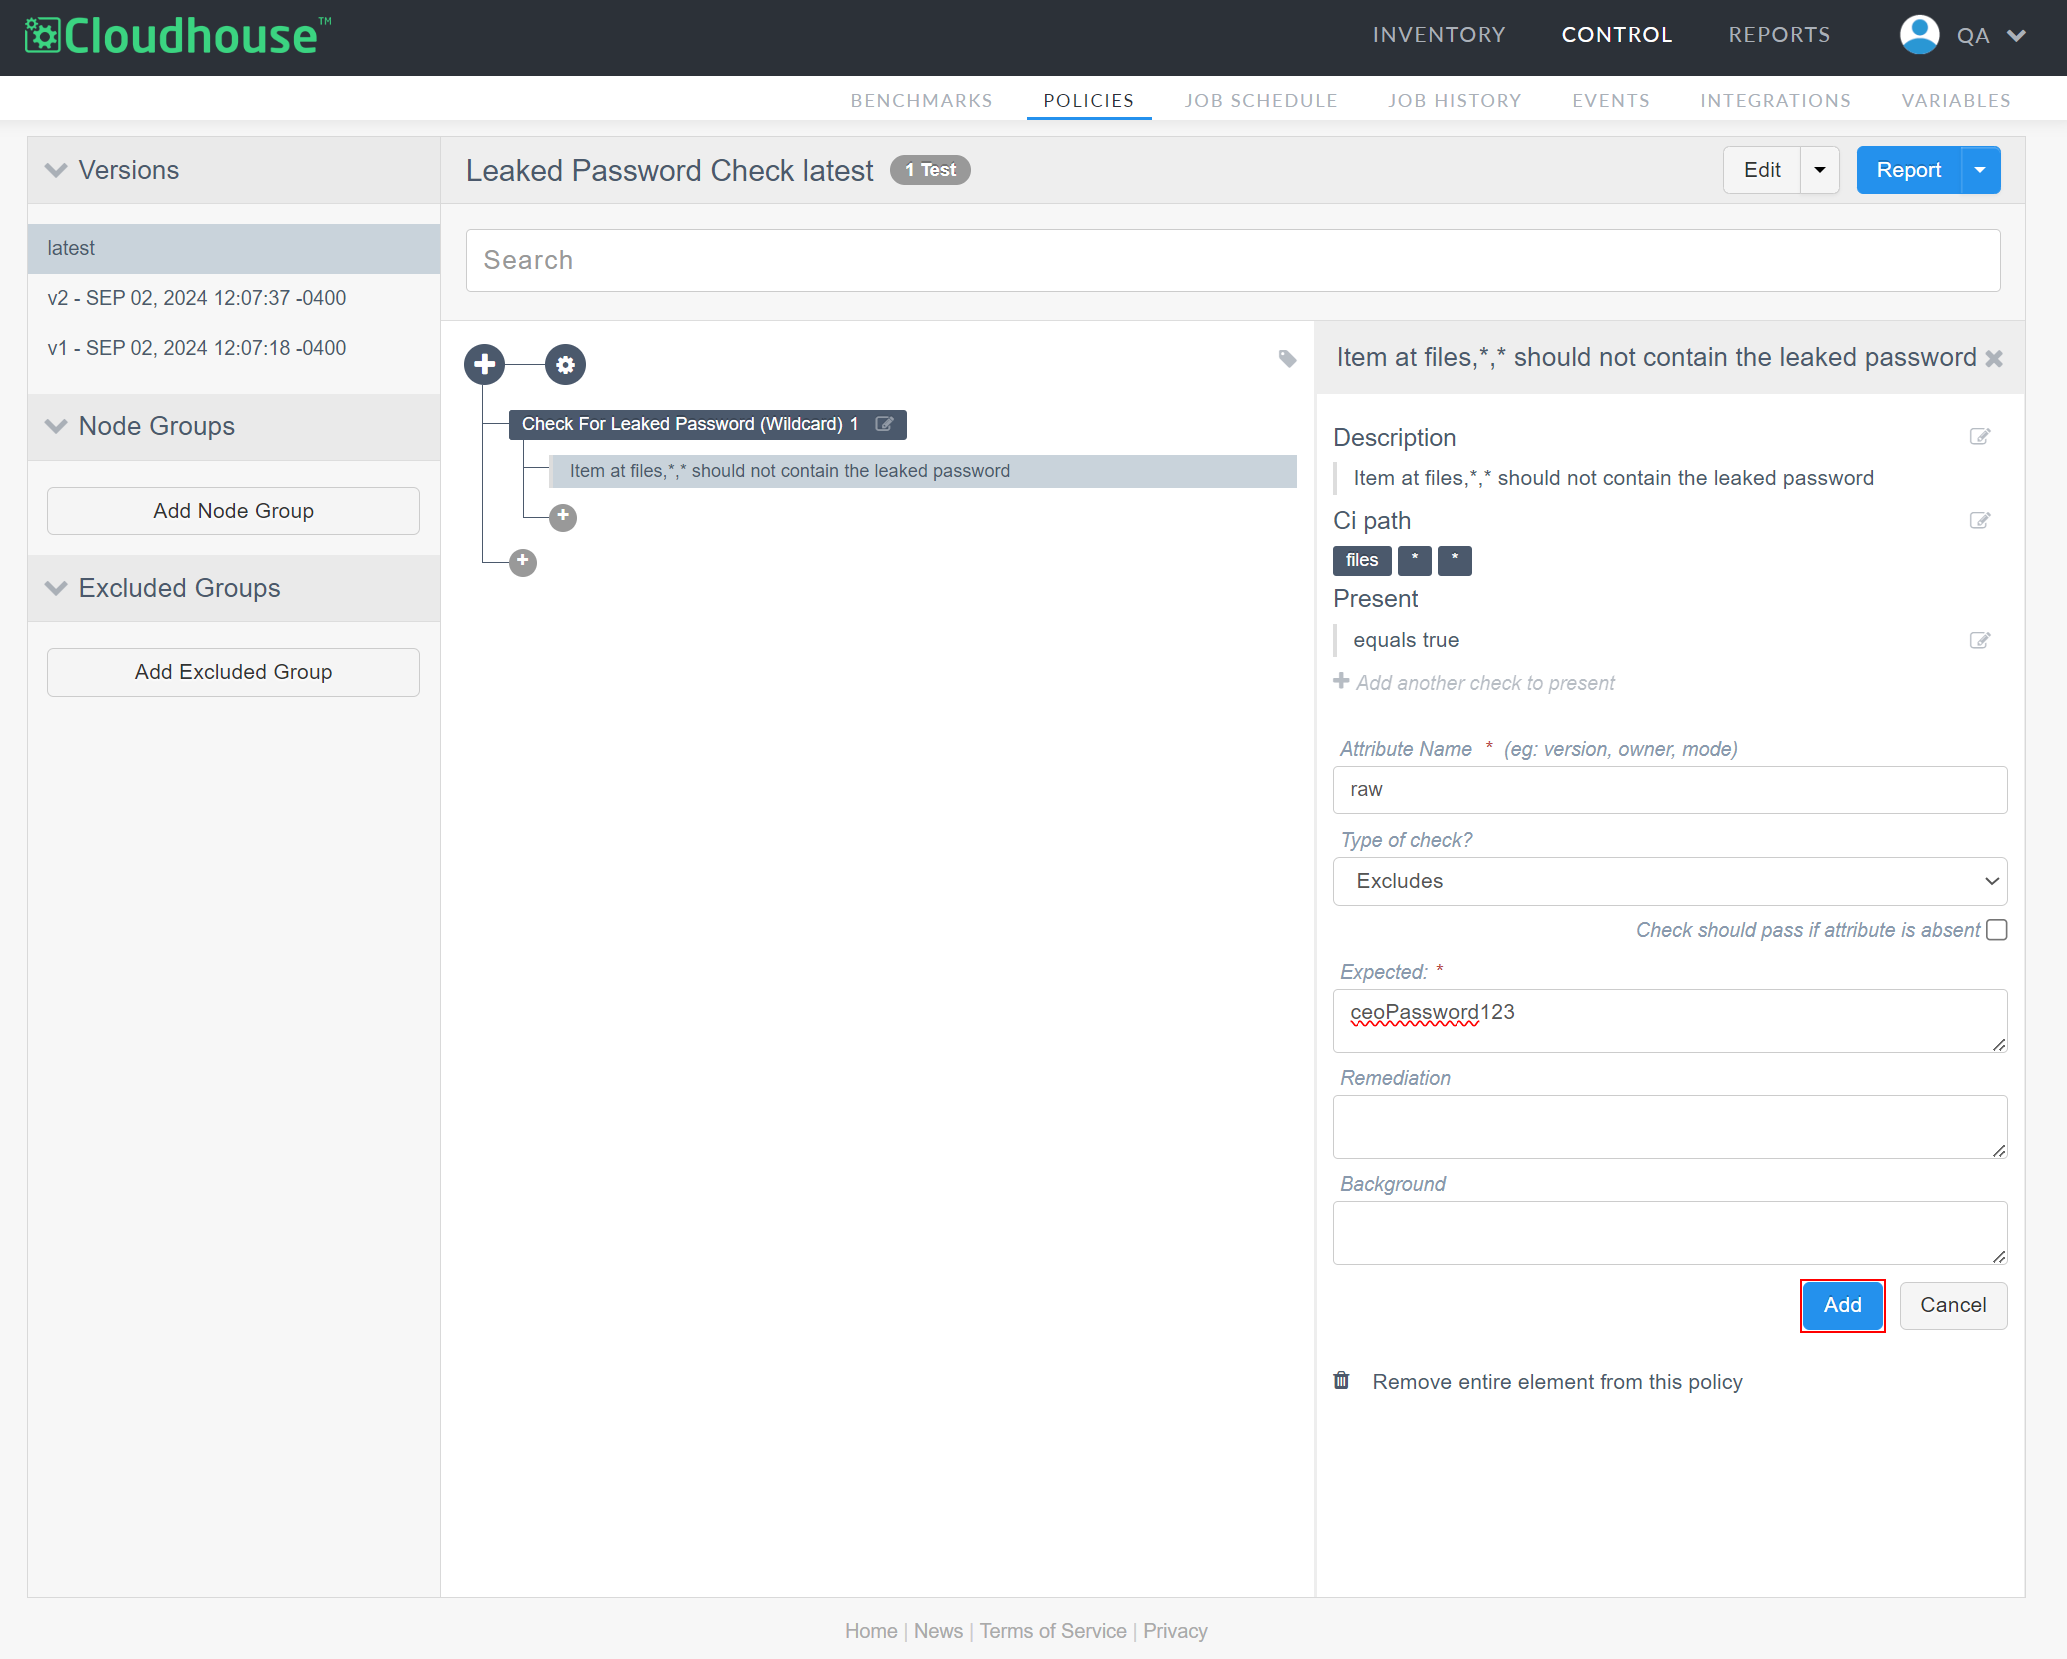
The attribute check is then added to the policy. Once complete, you have successfully created a custom policy that uses wildcard syntax to monitor all of the files retrieved from a defined directory.